背景
我的博客都是用 Hexo 在本地写完,提交个 commit 到 Github,触发 Github Action 自动部署到 Github Page 上。除了用 Vscode 写 Markdown 有点难受外,其它地方还好,至于为什么一定要用 Hexo + Github 的组合,白嫖 Github 的服务器它不香吗?
但是,最近体验了下语雀,发现他的文本编辑器还是很不错的,写文档很是丝滑,正好在 Github 上发现了个项目 - https://github.com/x-cold/yuque-hexo,可以将语雀的文章同步到 Hexo 中,是时候改变下博客写作流程了。下面就记录了整个迁移过程。
安装及配置 yuque-hexo
在 hexo 项目的根目录中执行以下命令,安装 yuque-hexo:
1. 新增配置:
1
2
3
4
5
6
7
8
9
10
11
12
13
14
15
16
17
18
19
20
21
| {
"yuqueConfig": {
"postPath": "source/_posts/yuque",
"cachePath": "yuque.json",
"mdNameFormat": "title",
"adapter": "hexo",
"concurrency": 5,
"baseUrl": "https://www.yuque.com/api/v2",
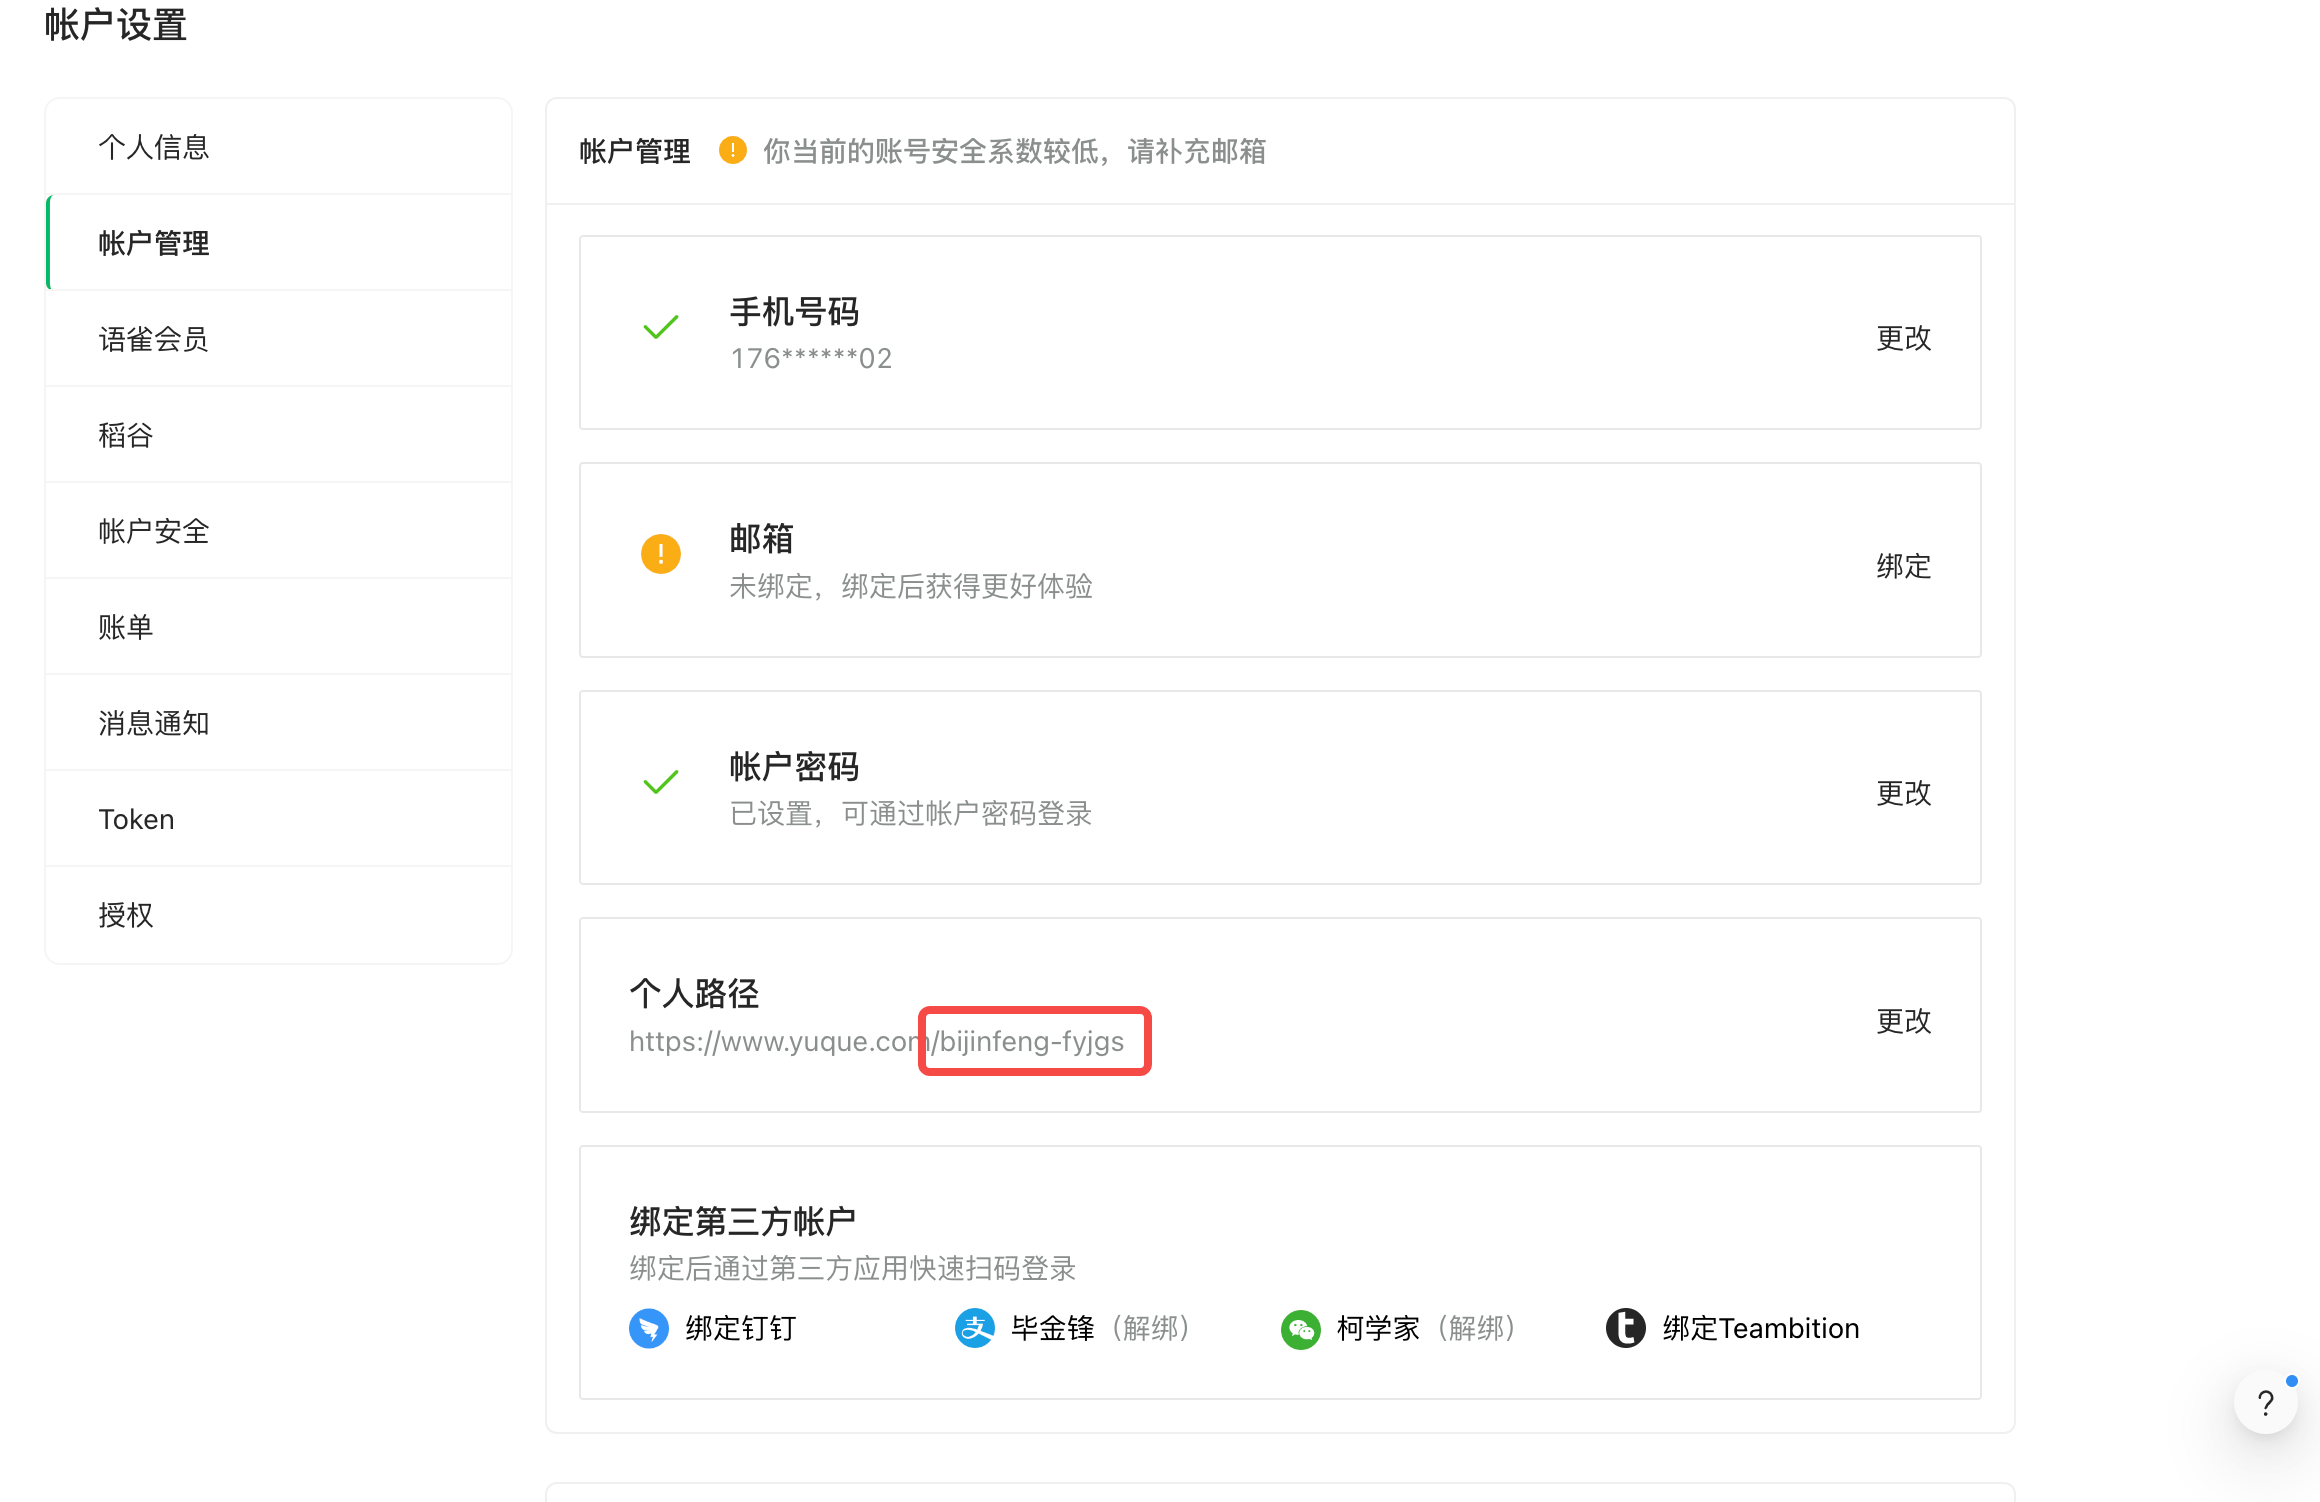
"login": "bijinfeng-fyjgs",
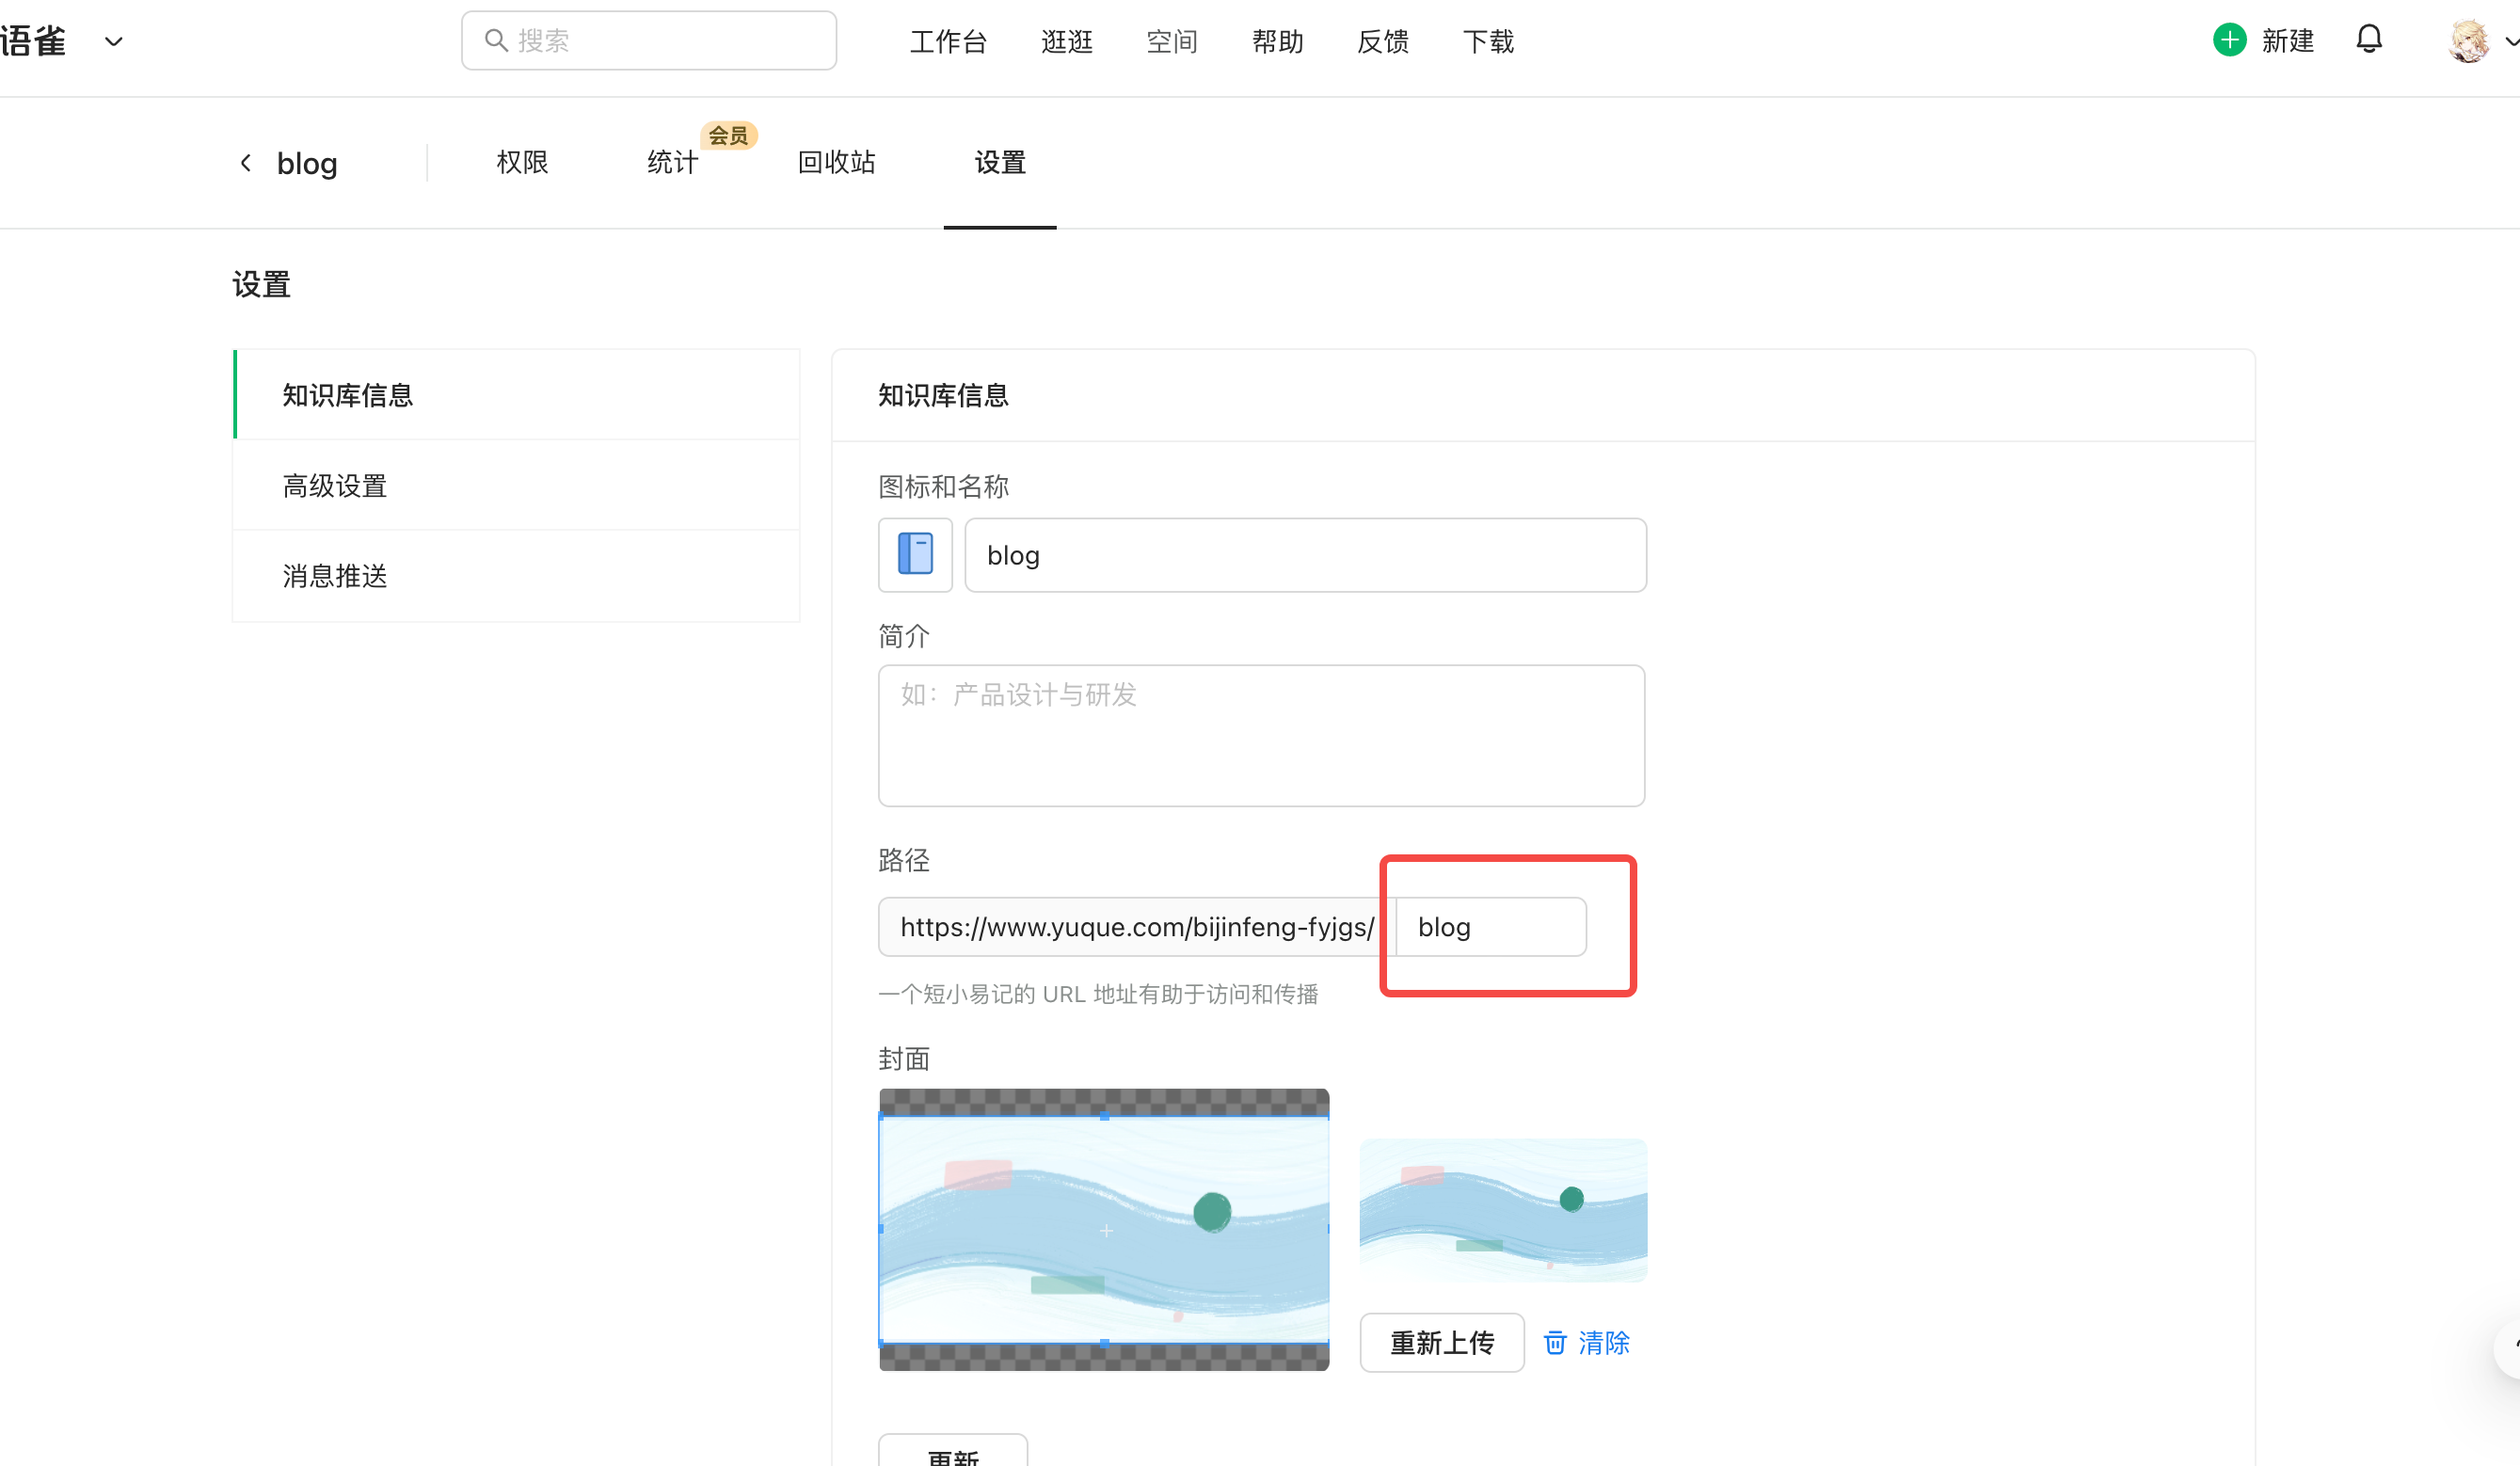
"repo": "blog",
"onlyPublished": true,
"onlyPublic": false,
"imgCdn": {
"concurrency": 0,
"imageBed": "upyun",
"enabled": true,
"bucket": "xxxx",
"prefixKey": "yuque"
}
}
}
|
yuqueConfig 中每个字段的作用在 yuque-hexo 的 README 中都有说明,我这里挑几个重点的说下:

2. 新增脚本
这些脚本主要用在后面的 Github Action 中,当然也方便本地调试使用
1
2
3
4
5
6
7
| {
"scripts": {
"clean:yuque": "yuque-hexo clean",
"sync": "yuque-hexo sync",
"reset": "npm run clean:yuque && npm run sync"
}
}
|
配置 Github Action
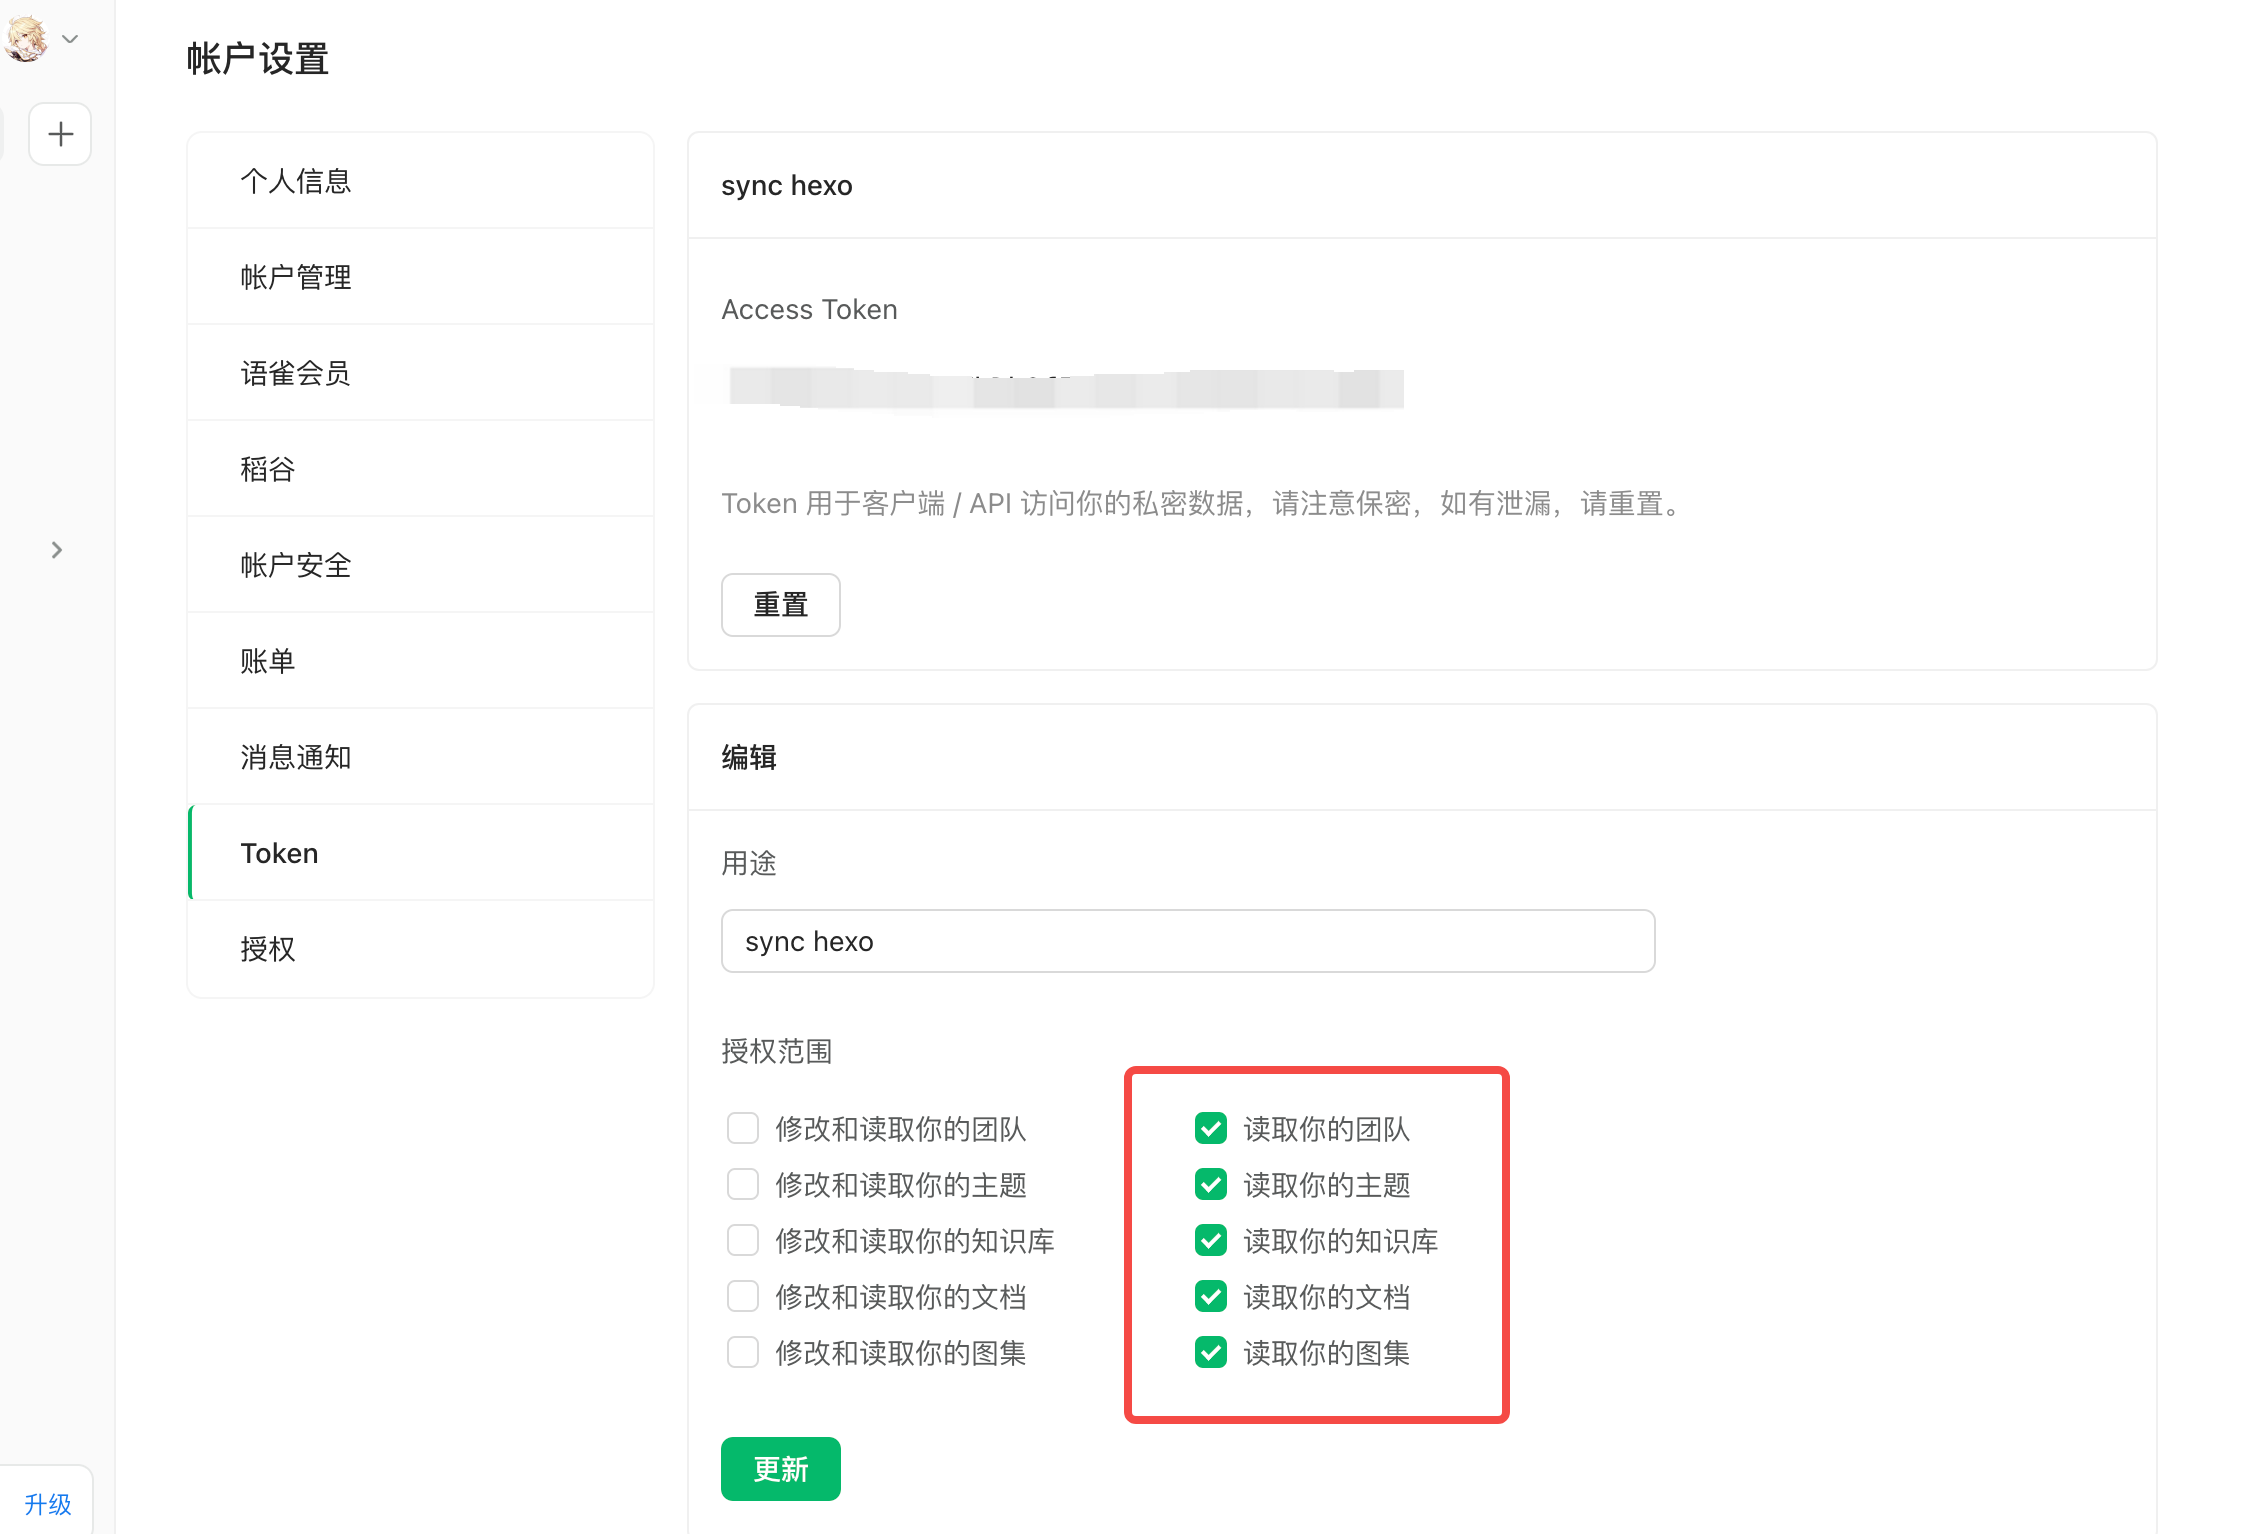
在修改 Github Action 配置文件前,我们先需要获取几个 Token:
新增或使用现有的 Token,Token 给个读取权限就行了
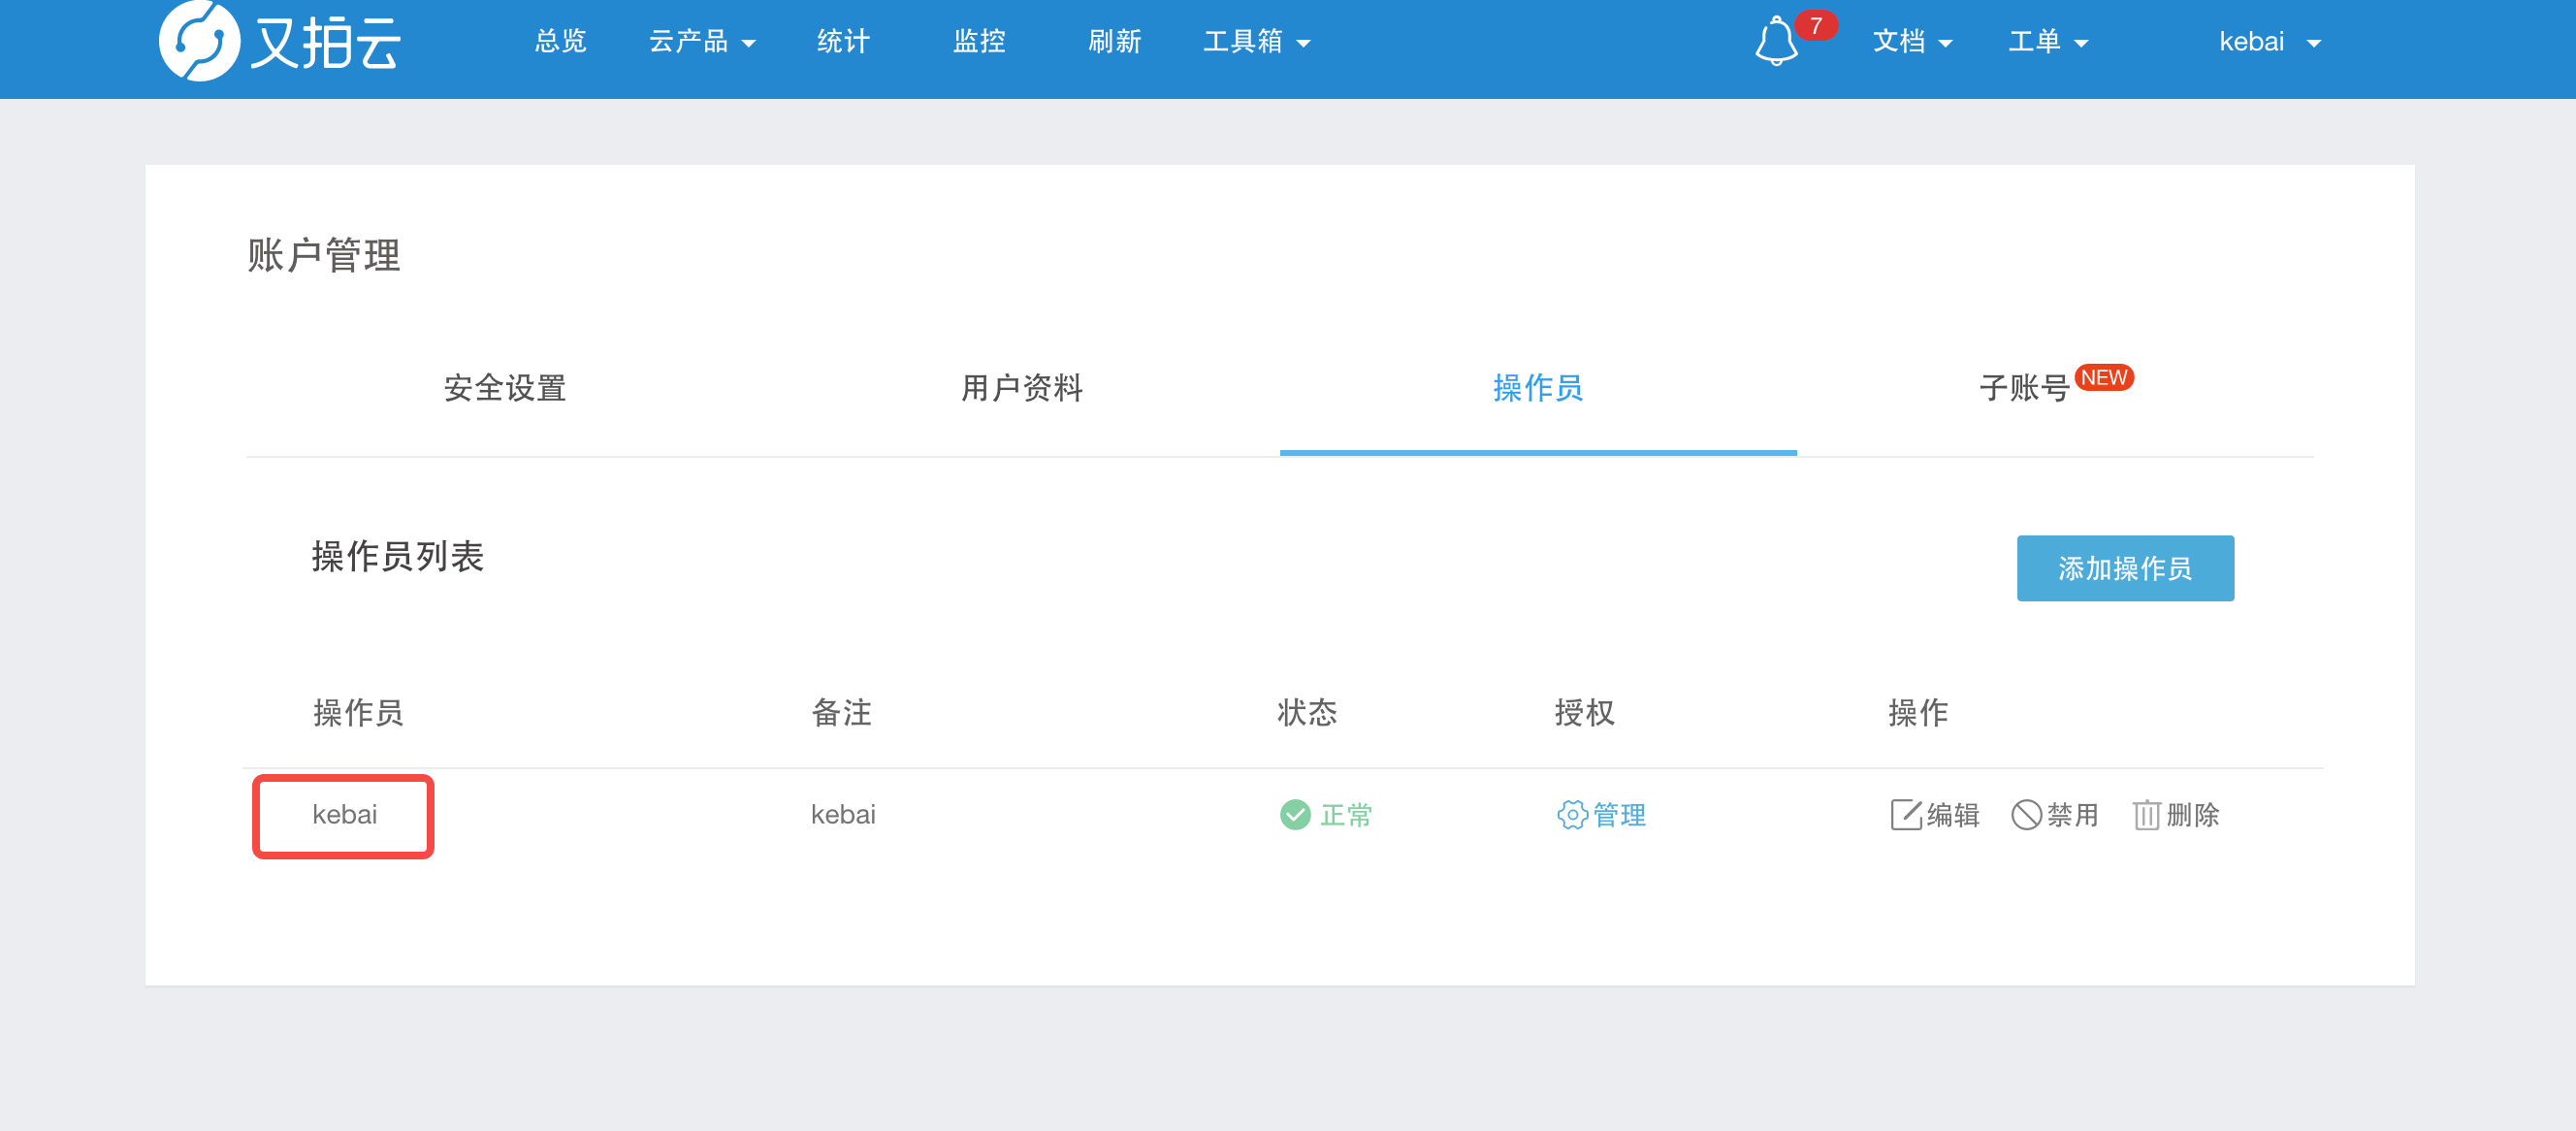
图床相关的密钥,我用的是又拍云,需要操作员的账号和密码(密码忘了的话,点击编辑按钮,重新生成个)
在 Github 项目的 Setting 中新增三个环境变量
上面的变量都准备好后,来到 hexo 项目的 .github/workflows 目录,新增个 deploy.yml 文件:
1
2
3
4
5
6
7
8
9
10
11
12
13
14
15
16
17
18
19
20
21
22
23
24
25
26
27
28
29
30
31
32
33
34
35
36
| name: Build and Deploy
on:
push:
branches:
- master
jobs:
build-and-deploy:
environment: github-pages
env:
yuque_token: ${{ secrets.YUQUE_TOKEN }}
secret_id: ${{ secrets.SECRET_ID }}
secret_key: ${{ secrets.SECRET_KEY }}
runs-on: ubuntu-latest
steps:
- name: Checkout
uses: actions/checkout@master
with:
submodules: true
- name: Install Dependencies
run: yarn install
- name: Sync Yuque
run: YUQUE_TOKEN=${{ env.yuque_token }} SECRET_ID=${{ env.secret_id }} SECRET_KEY=${{ env.secret_key }} yarn sync
- name: Generate
run: yarn build
- name: Deploy
uses: peaceiris/actions-gh-pages@v3
with:
github_token: ${{ secrets.ACCESS_TOKEN }}
publish_dir: ./public
|
或者你的项目中原本就有 Action 的配置,现在只需要增加 yuque-hexo 的相关配置就行:
- 消费上面设置的环境变量
注意 environment 字段必须和你在 Github Setting 中配置的 Environments 字段对应上
1
2
3
4
5
| environment: github-pages
env:
yuque_token: ${{ secrets.YUQUE_TOKEN }}
secret_id: ${{ secrets.SECRET_ID }}
secret_key: ${{ secrets.SECRET_KEY }}
|
- 在运行 hexo generate 之前,先同步语雀的文章
1
2
| - name: Sync Yuque
run: YUQUE_TOKEN=${{ env.yuque_token }} SECRET_ID=${{ env.secret_id }} SECRET_KEY=${{ env.secret_key }} yarn sync
|
到这里 yueque-hexo 的配置工作就完成了,保存,提交 commit 到 GitHub 上触发 Action,如果一切顺利的话语雀的文章就会同步过来。
主动同步
上面的动作完成后,我们虽然能够同步语雀的文章,但是我们在语雀写完文章后,还需要到 github 上手动触发下 Action,体验还是不够完美,为了解决这个问题,我们有两个方案:
定义任务
给 Action 添加个定时任务,在每天的 2:00 同步一次语雀
1
2
3
| on:
schedule:
- cron: "0 2 * * *"
|
webhook
在语雀写完文章后,自动触发个 webhook,启动 Github Action 同步文章
使用 API 远程触发 Github Action
- 现在 Action 只能在提交 commit 后触发,新增个配置,让 Action 支持被 api 触发:
1
2
3
4
5
6
7
8
9
| on:
push:
branches:
- master
repository_dispatch:
types:
- webhook
|
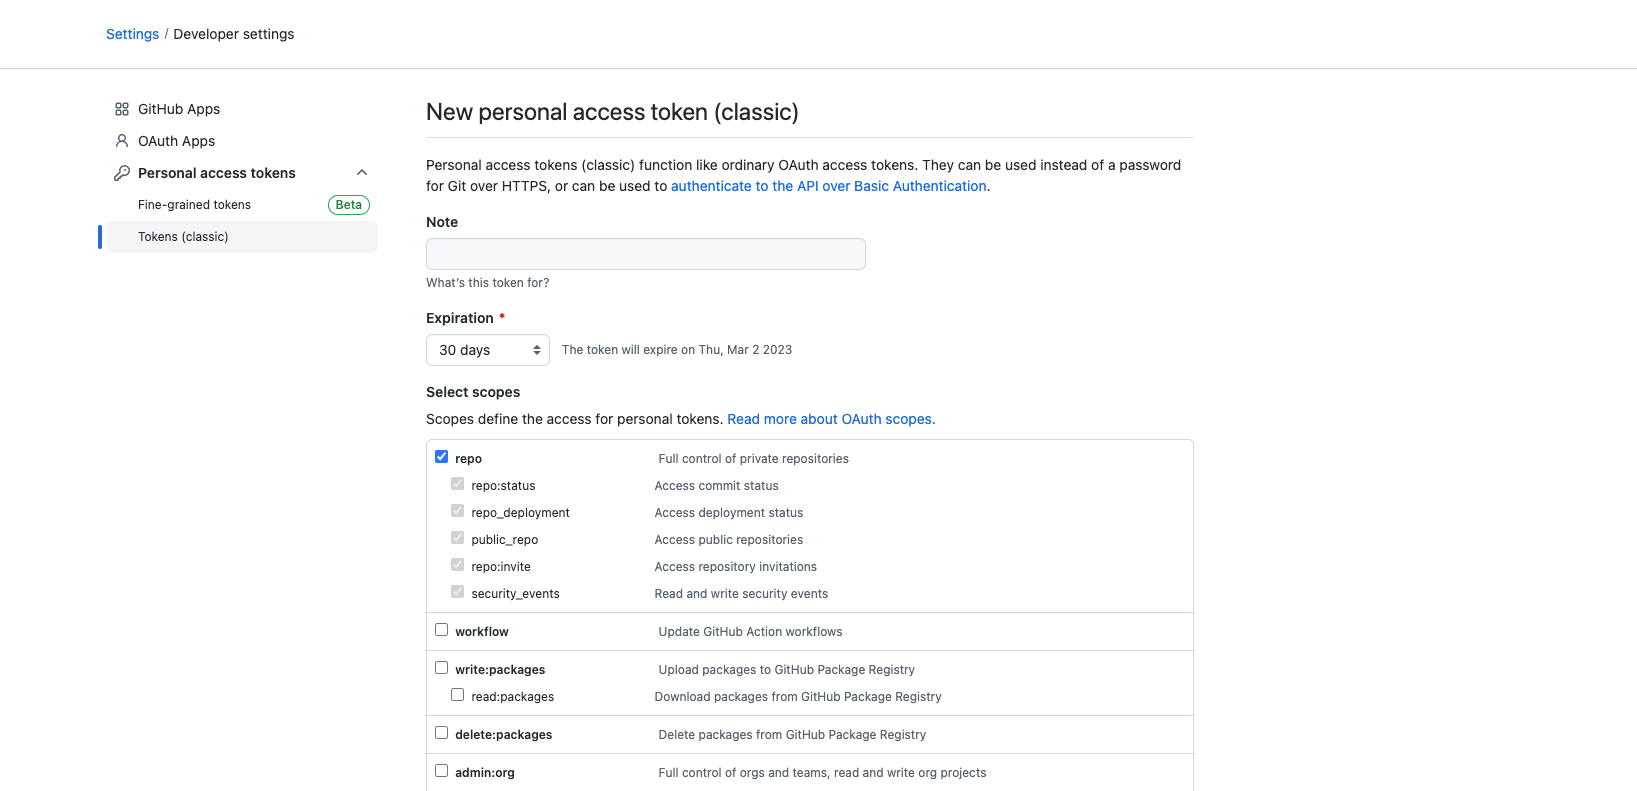
- 访问链接页面 https://github.com/settings/tokens/new 申请一个 Token,需要勾选 repo 权限。
- API 调用格式
1
2
3
4
5
| curl -X POST https://api.github.com/repos/:owner/:repo/dispatches \
-H "Accept: application/vnd.github.everest-preview+json" \
-H "Authorization: token TRIGGER_TOKEN" \
--data '{"event_type": "TRIGGER_EVENT"}'
|
其中,owner 是用户名,repo 是仓库名, TRIGGER_TOKEN 是上面申请的 Token 凭证,TRIGGER_EVENT 是自定义的事件名。
若是语雀支持自定义 webhook 格式,那么本文到这里就要结束了,可惜天公不作美,语雀只支持配置个接口 URL。那么我们就需要借助云函数来倒一手了,代理后的调用路径变成:语雀 webhook -> 云函数 -> gtihub api。
腾讯云函数
我这里使用的是腾讯云函数,其它云服务商的云函数只能自己探索了。
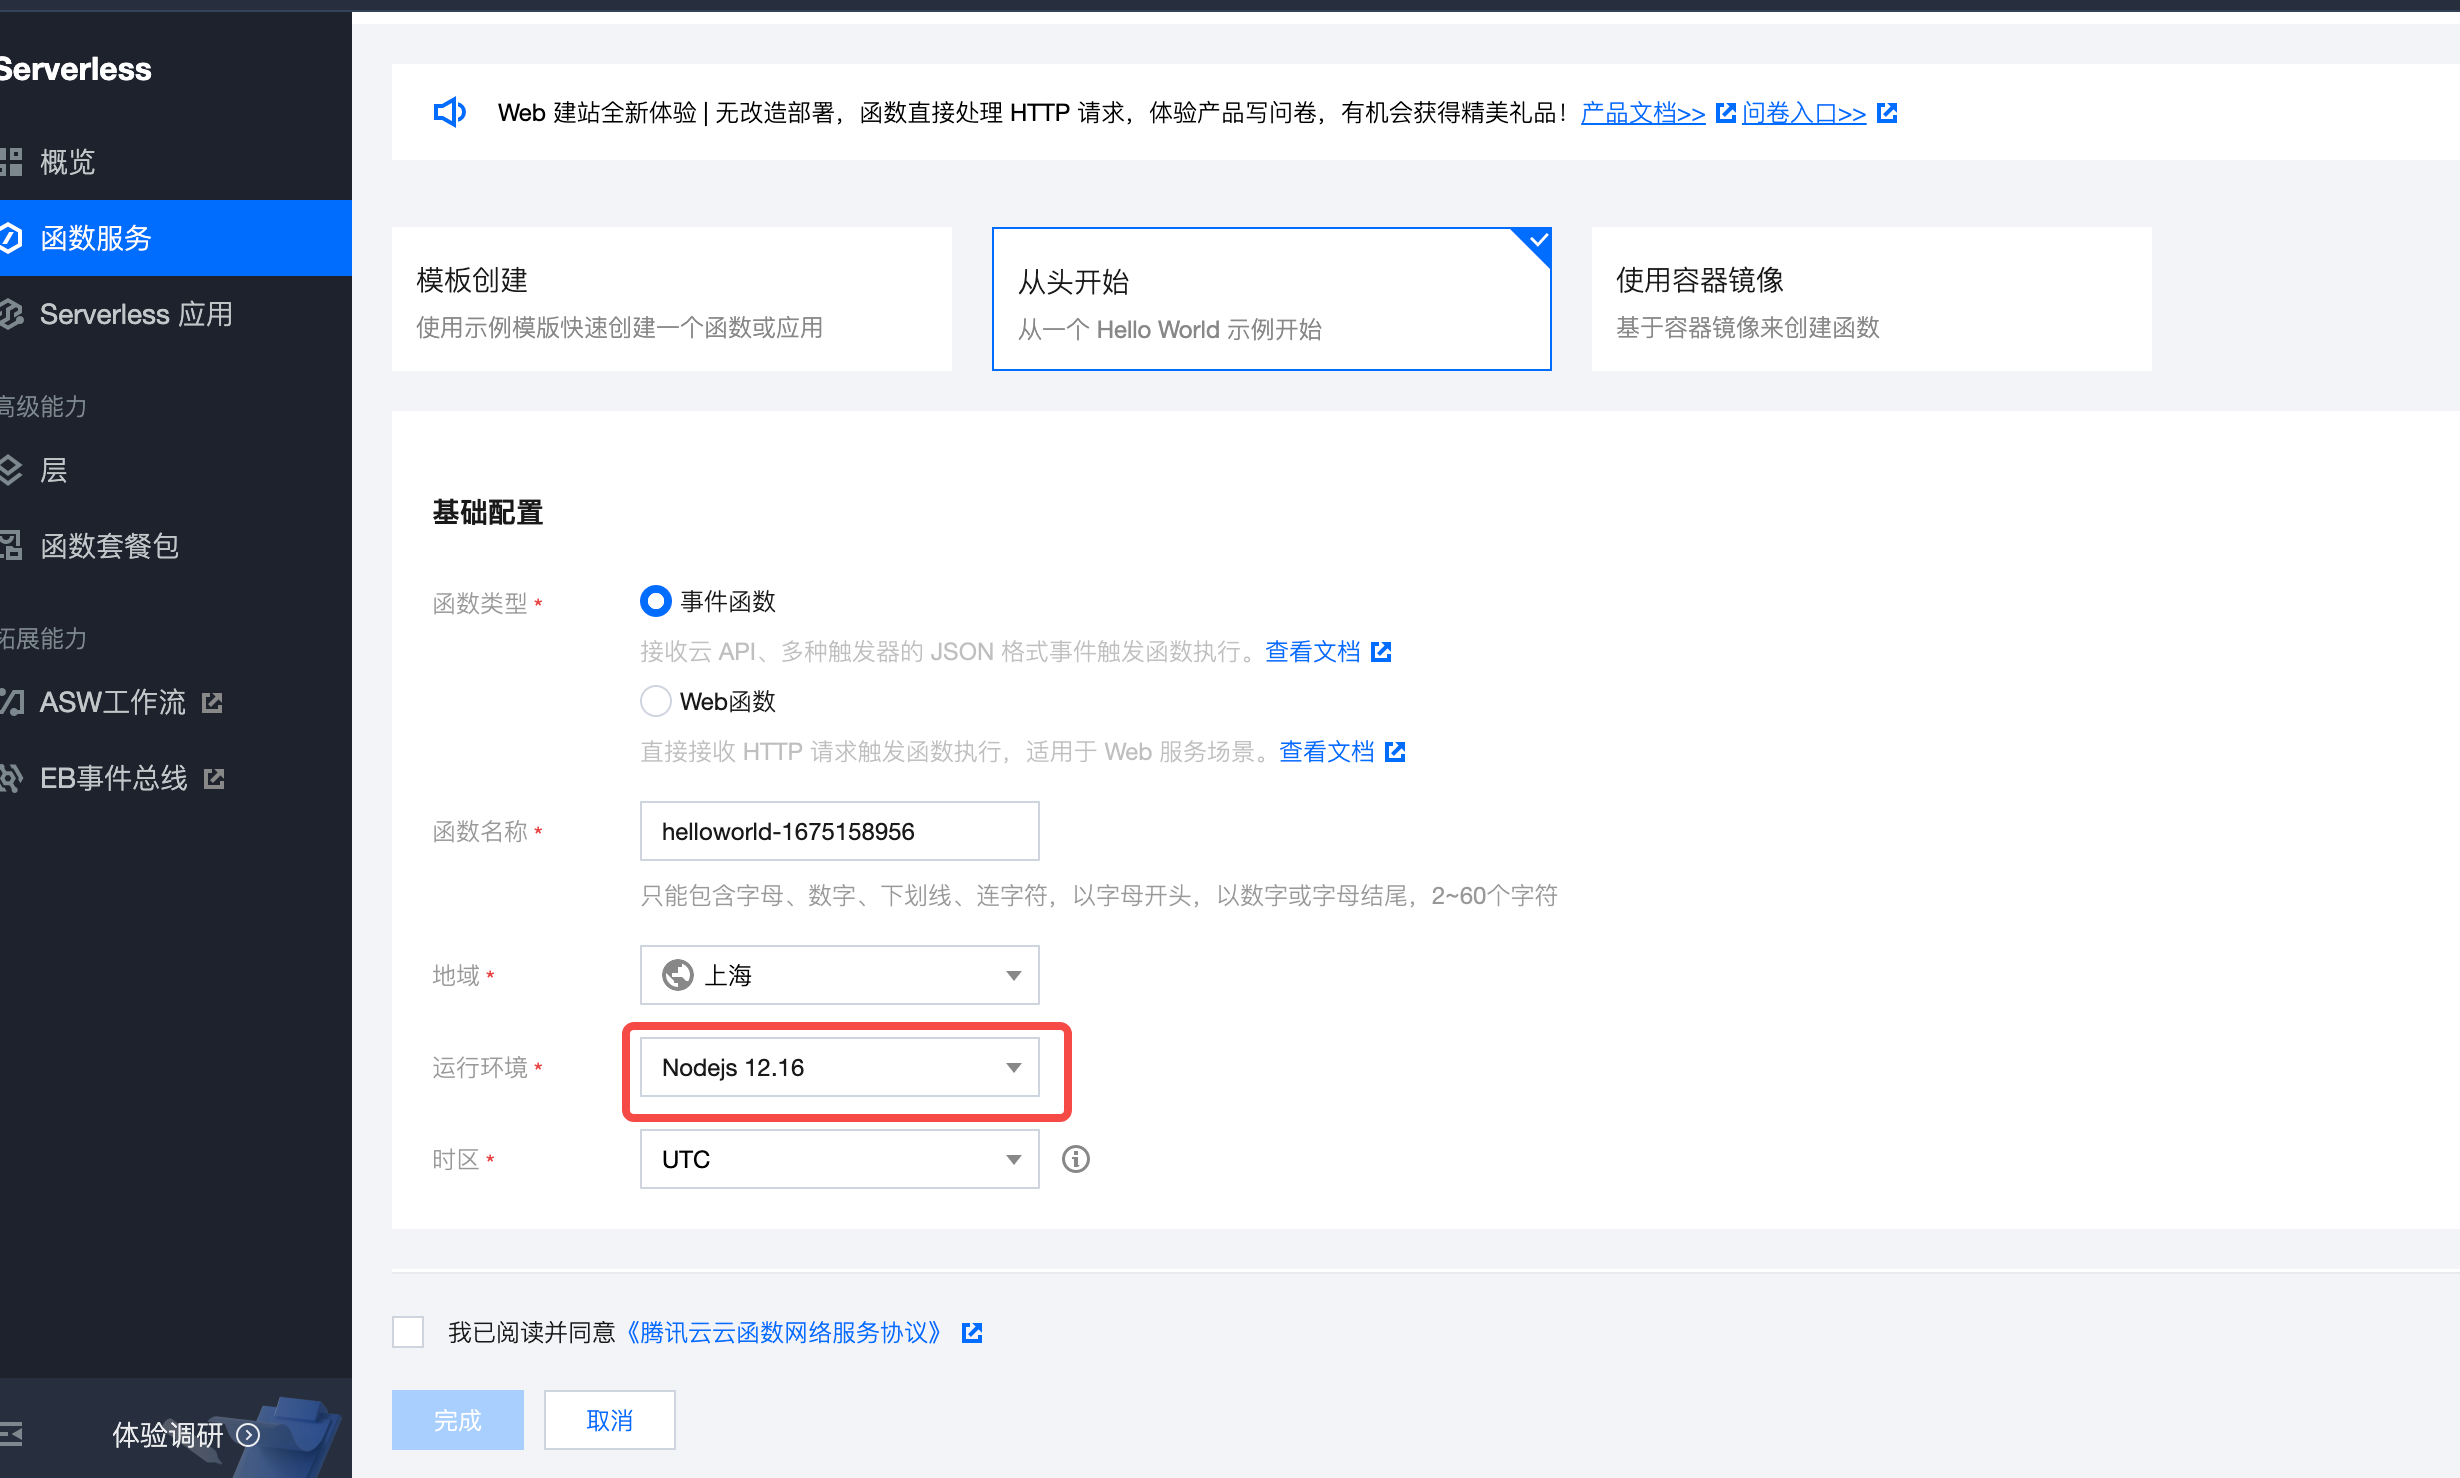
新建个云函数,我们只要做个接口转发,不用那么麻烦就不用模板了(作为前端 er 当然首选 node):
下面编辑云函数:
1
2
3
4
5
6
7
8
9
10
11
12
13
14
15
16
17
18
19
20
21
22
23
24
25
26
27
28
29
30
| "use strict";
const request = require("request");
exports.main_handler = async (event, context) => {
const res = await new Promise((resolve, reject) => {
request(
{
url: "https://api.github.com/repos/:owner/:repo/dispatches",
method: "POST",
json: true,
headers: {
"User-Agent": "curl/7.52.1",
"Content-Type": "application/json",
Authorization: "token xxxxx",
Accept: "application/vnd.github.everest-preview+json",
},
body: { event_type: "webhook" },
},
function (error, response, body) {
if (response.status_code == 204) {
resolve(response);
} else {
reject(error);
}
}
);
});
return res;
};
|
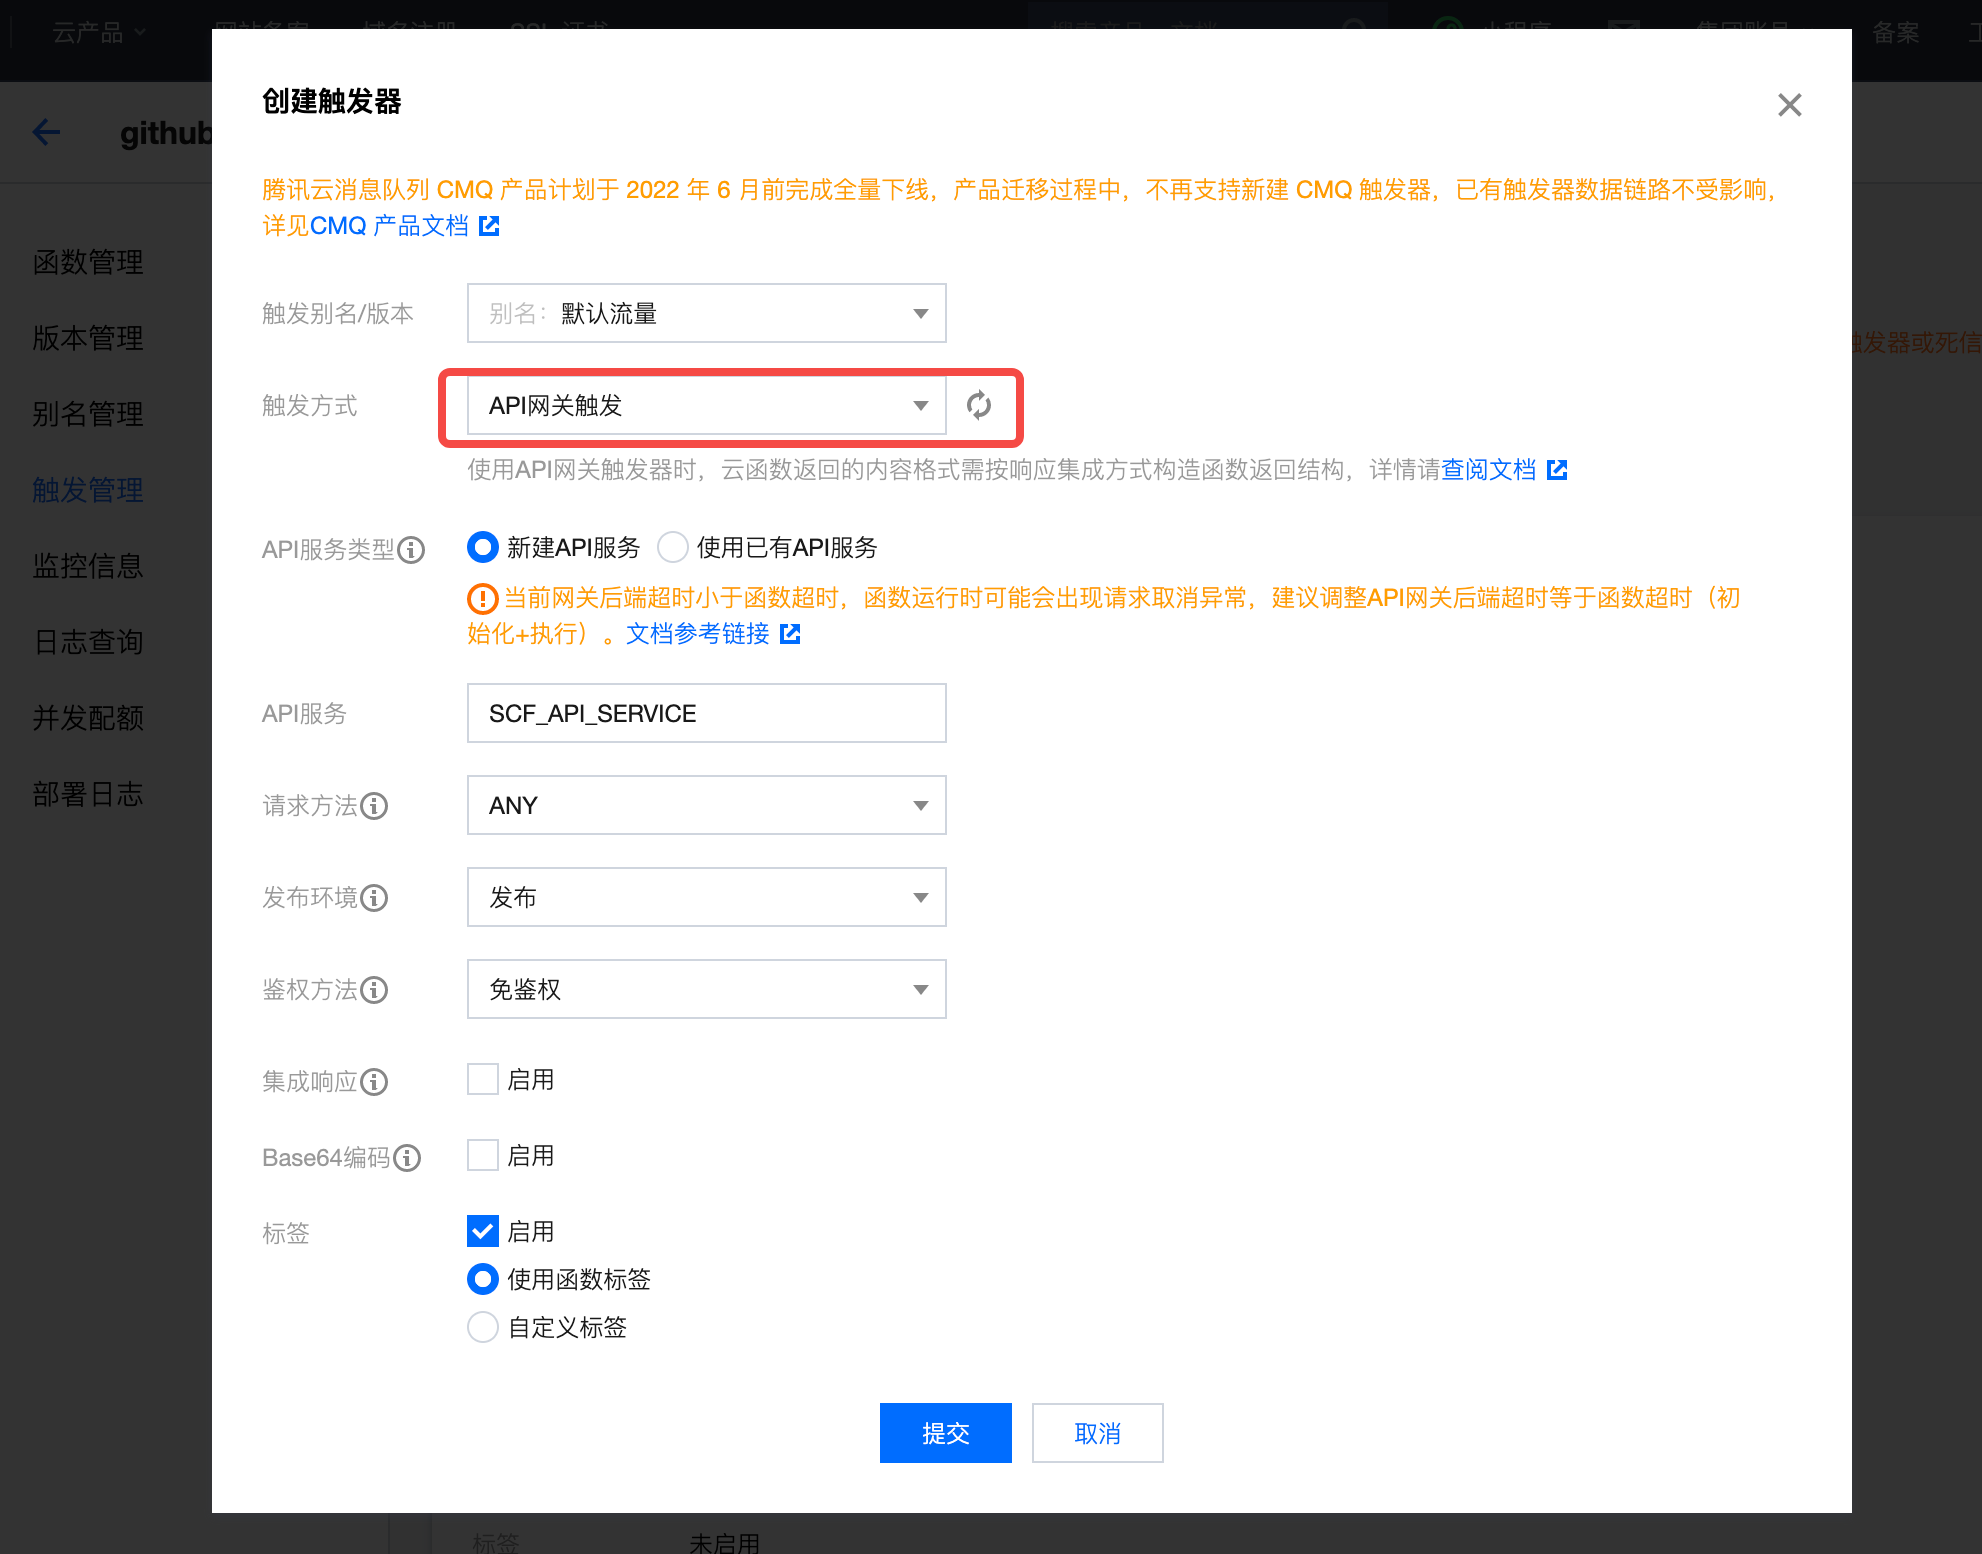
触发器设置,触发方式选择「API 网关触发」,其它默认:
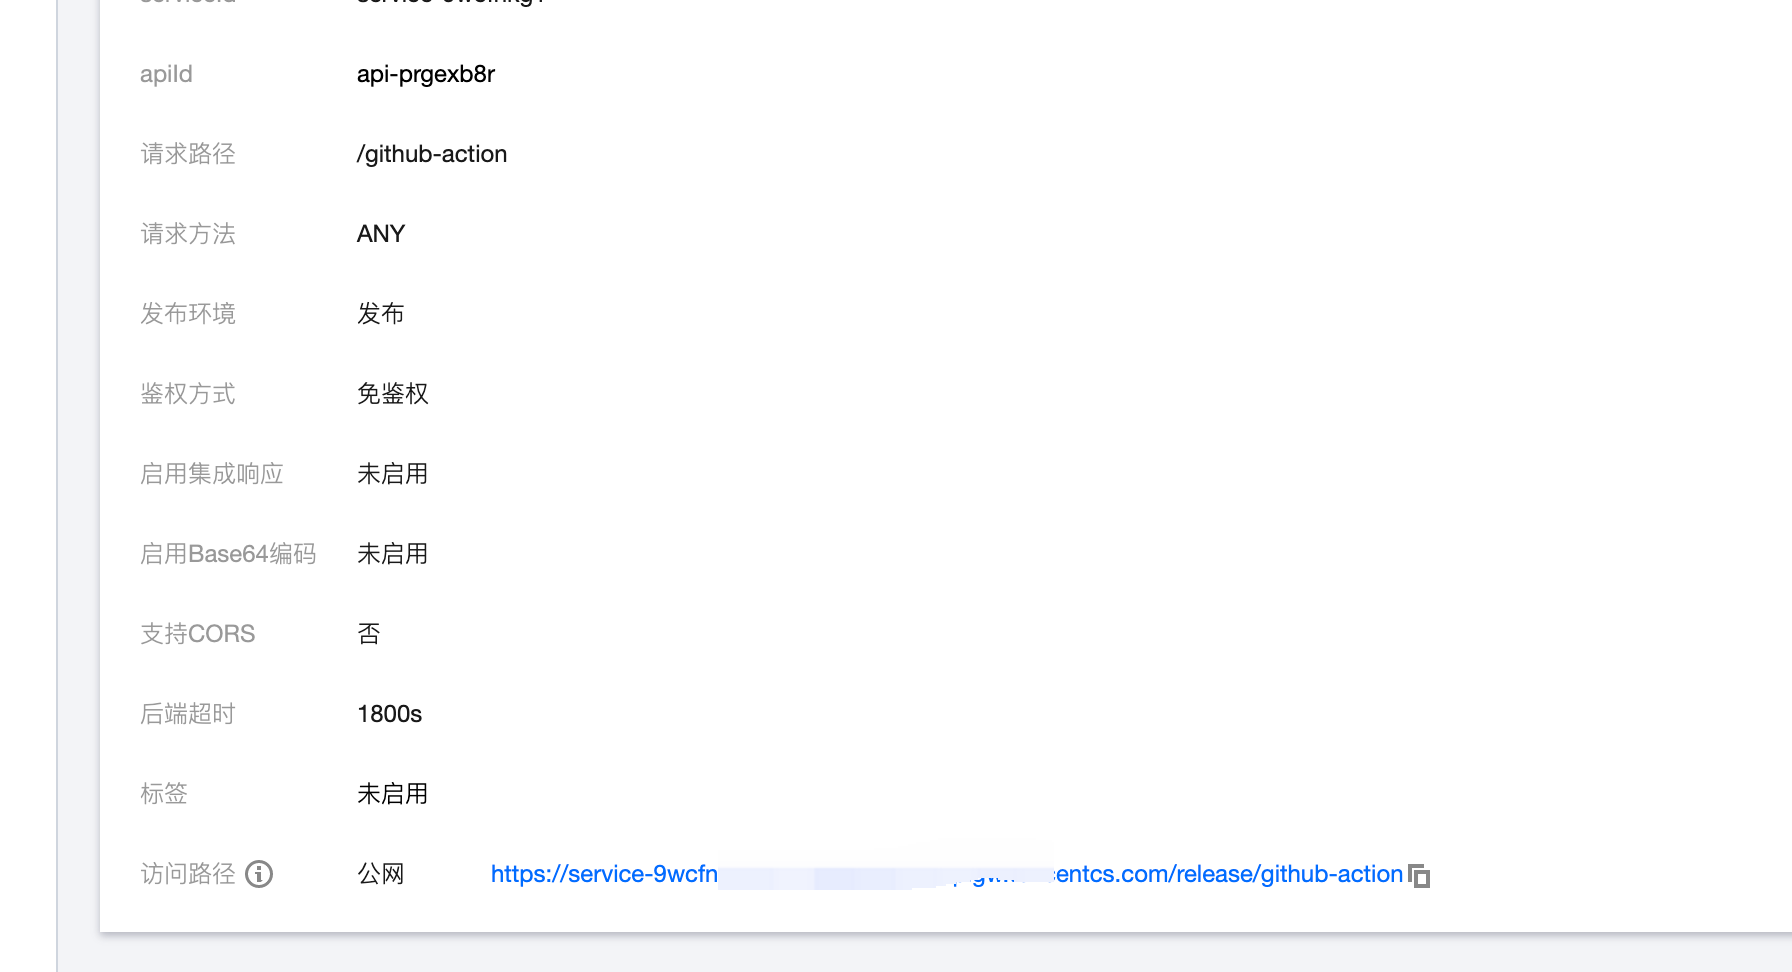
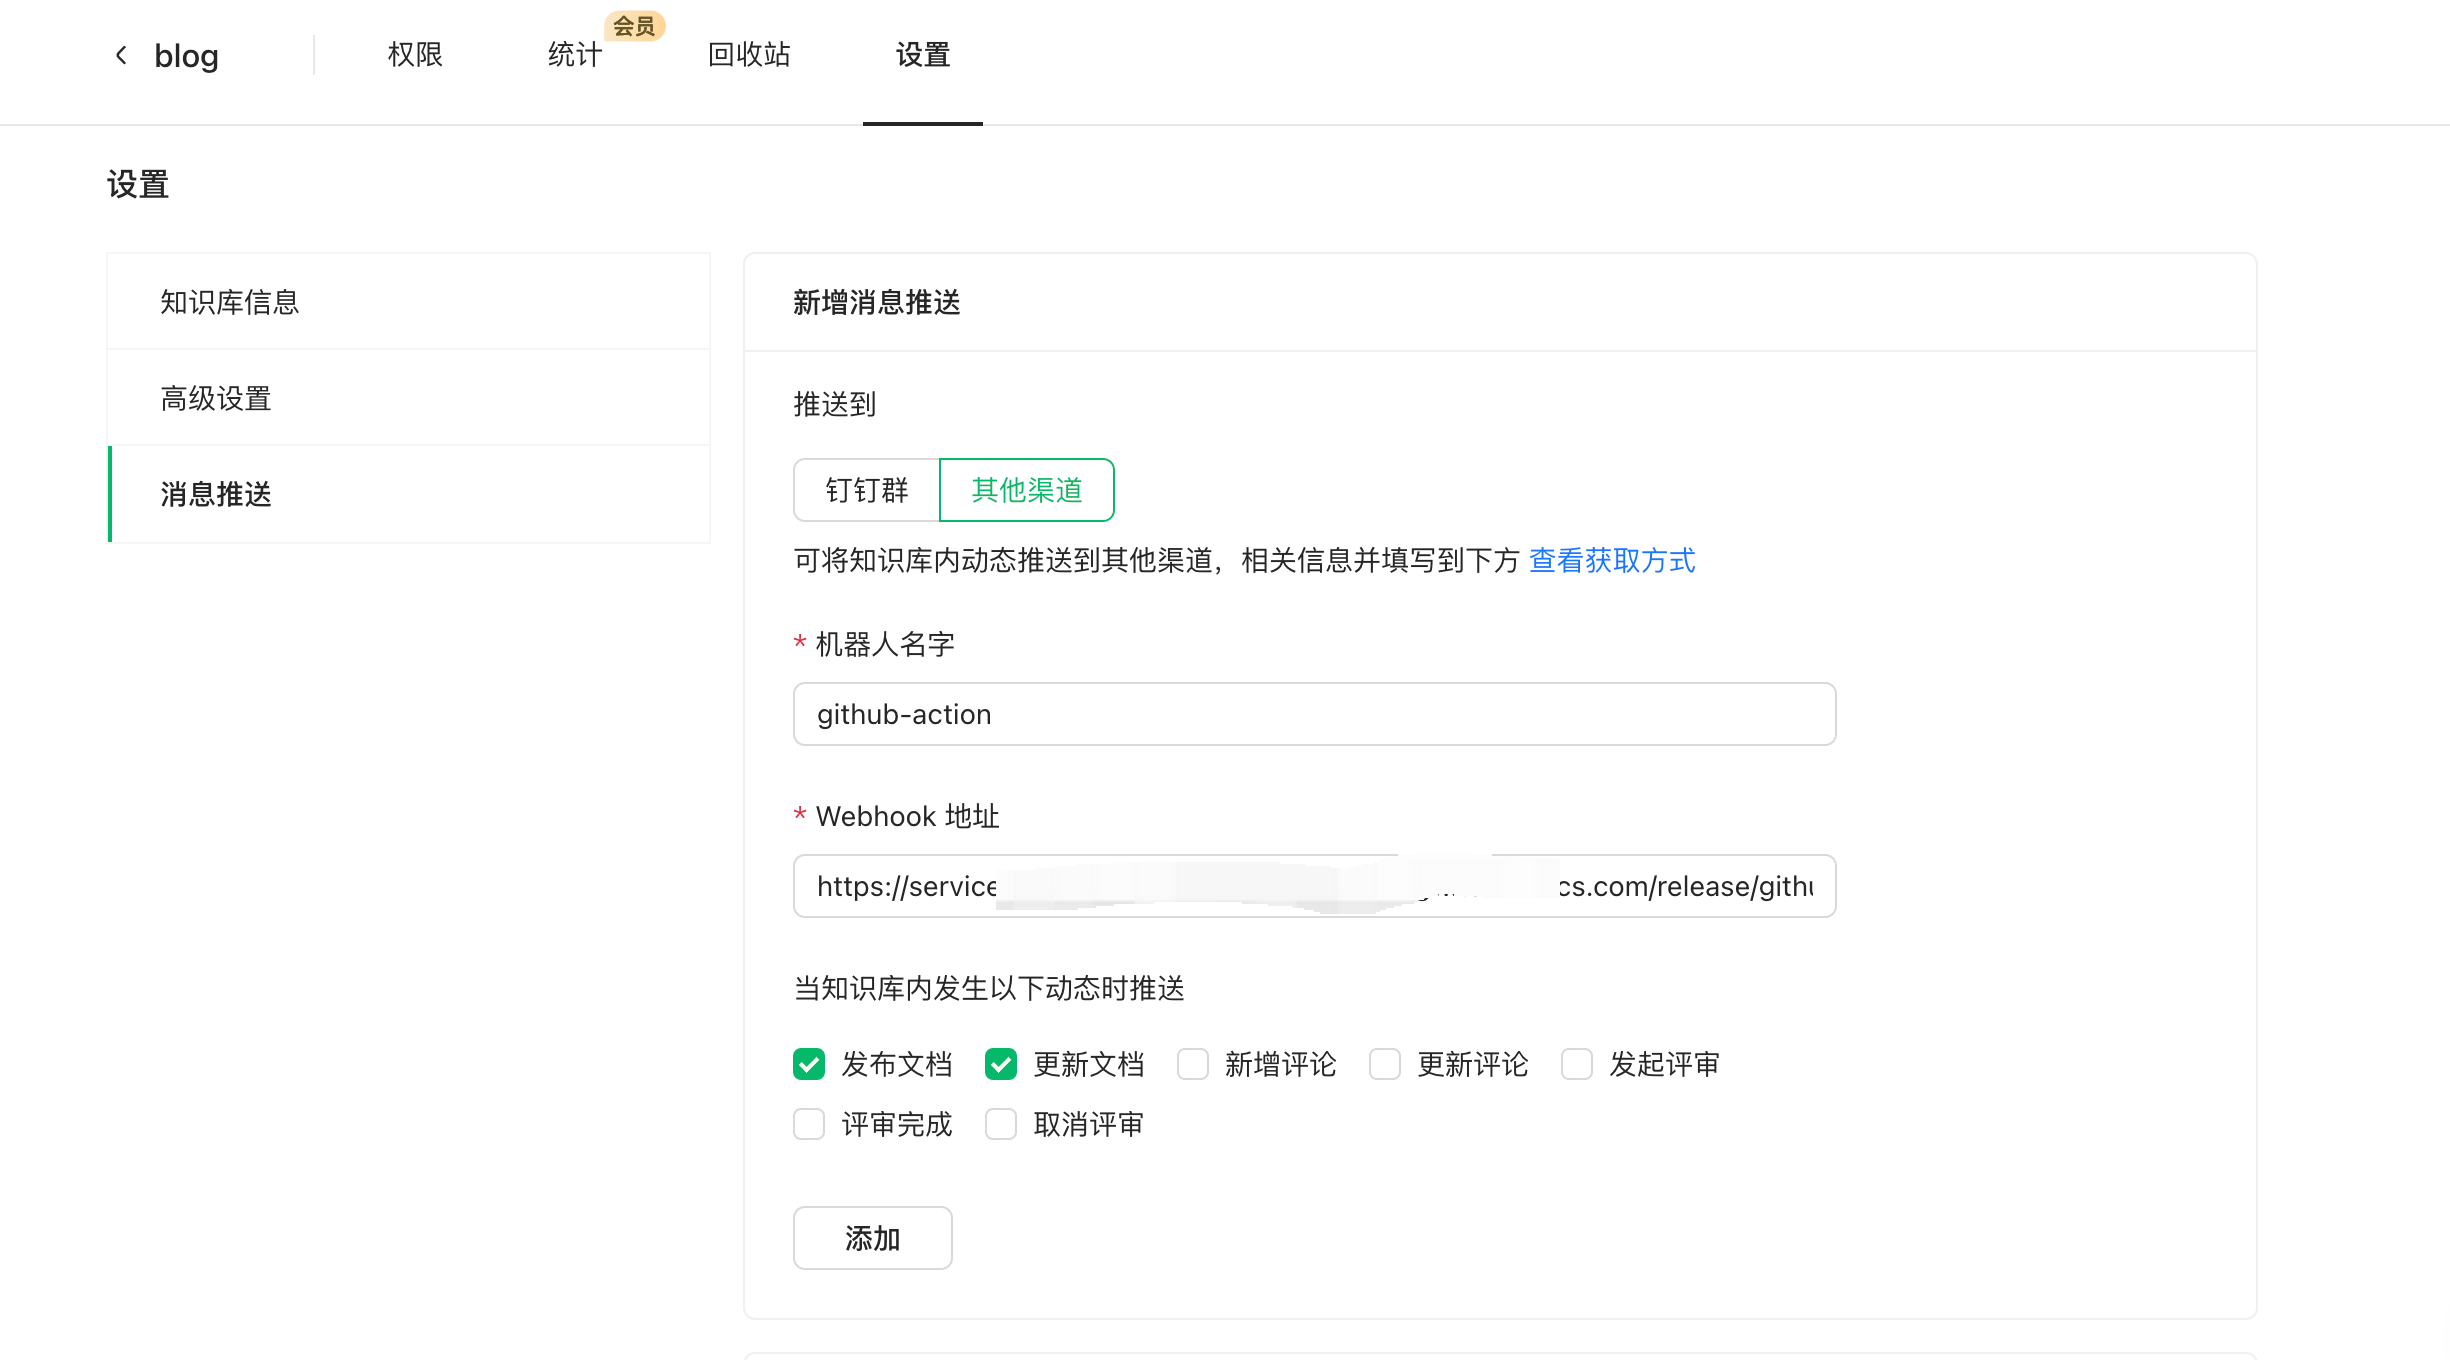
创建成功后,腾讯云会提供个公网访问路径,将其配置到知识库的「消息推送」设置中:
AirCode
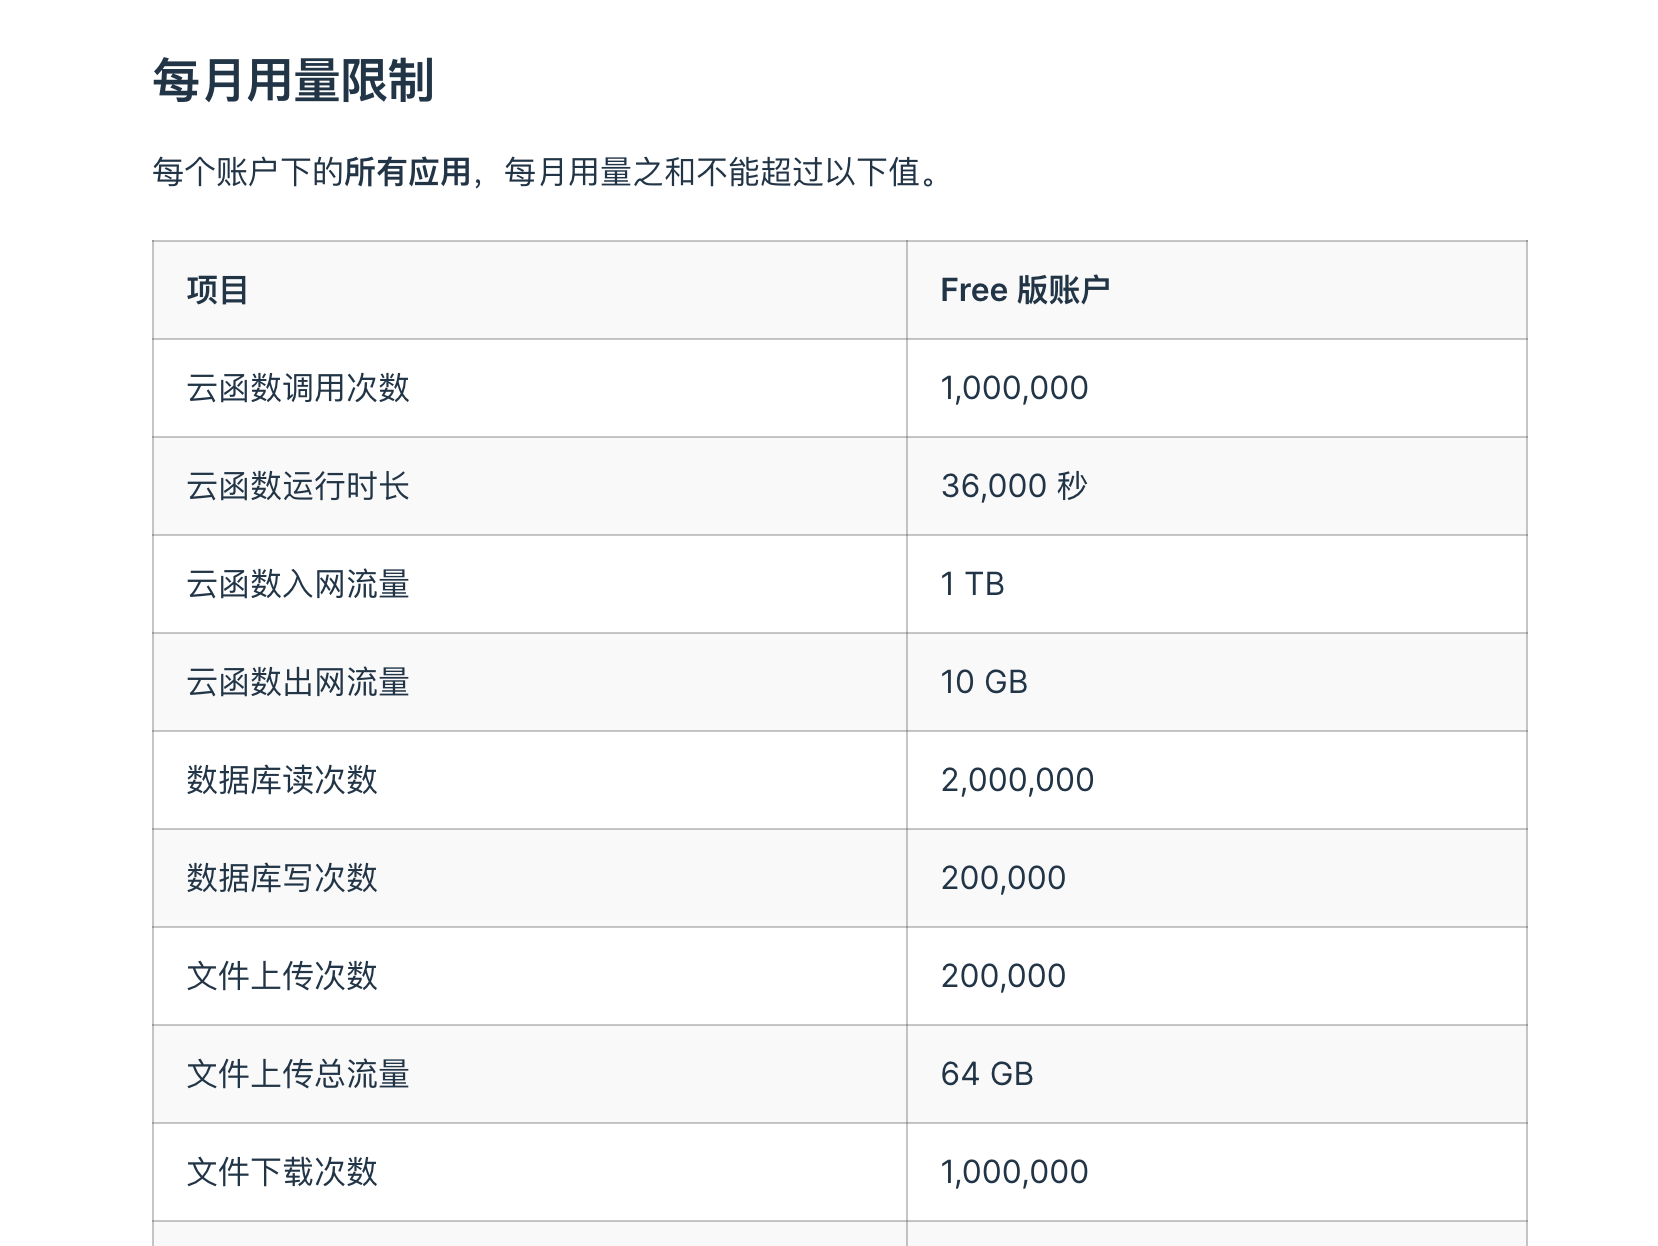
腾讯云 serverless 并不是免费的,前三个月有免费额度,之后收费,既然要白嫖就白嫖到底。
推荐使用 https://aircode.io/,每月的免费额度如下,绝对够你使用了:
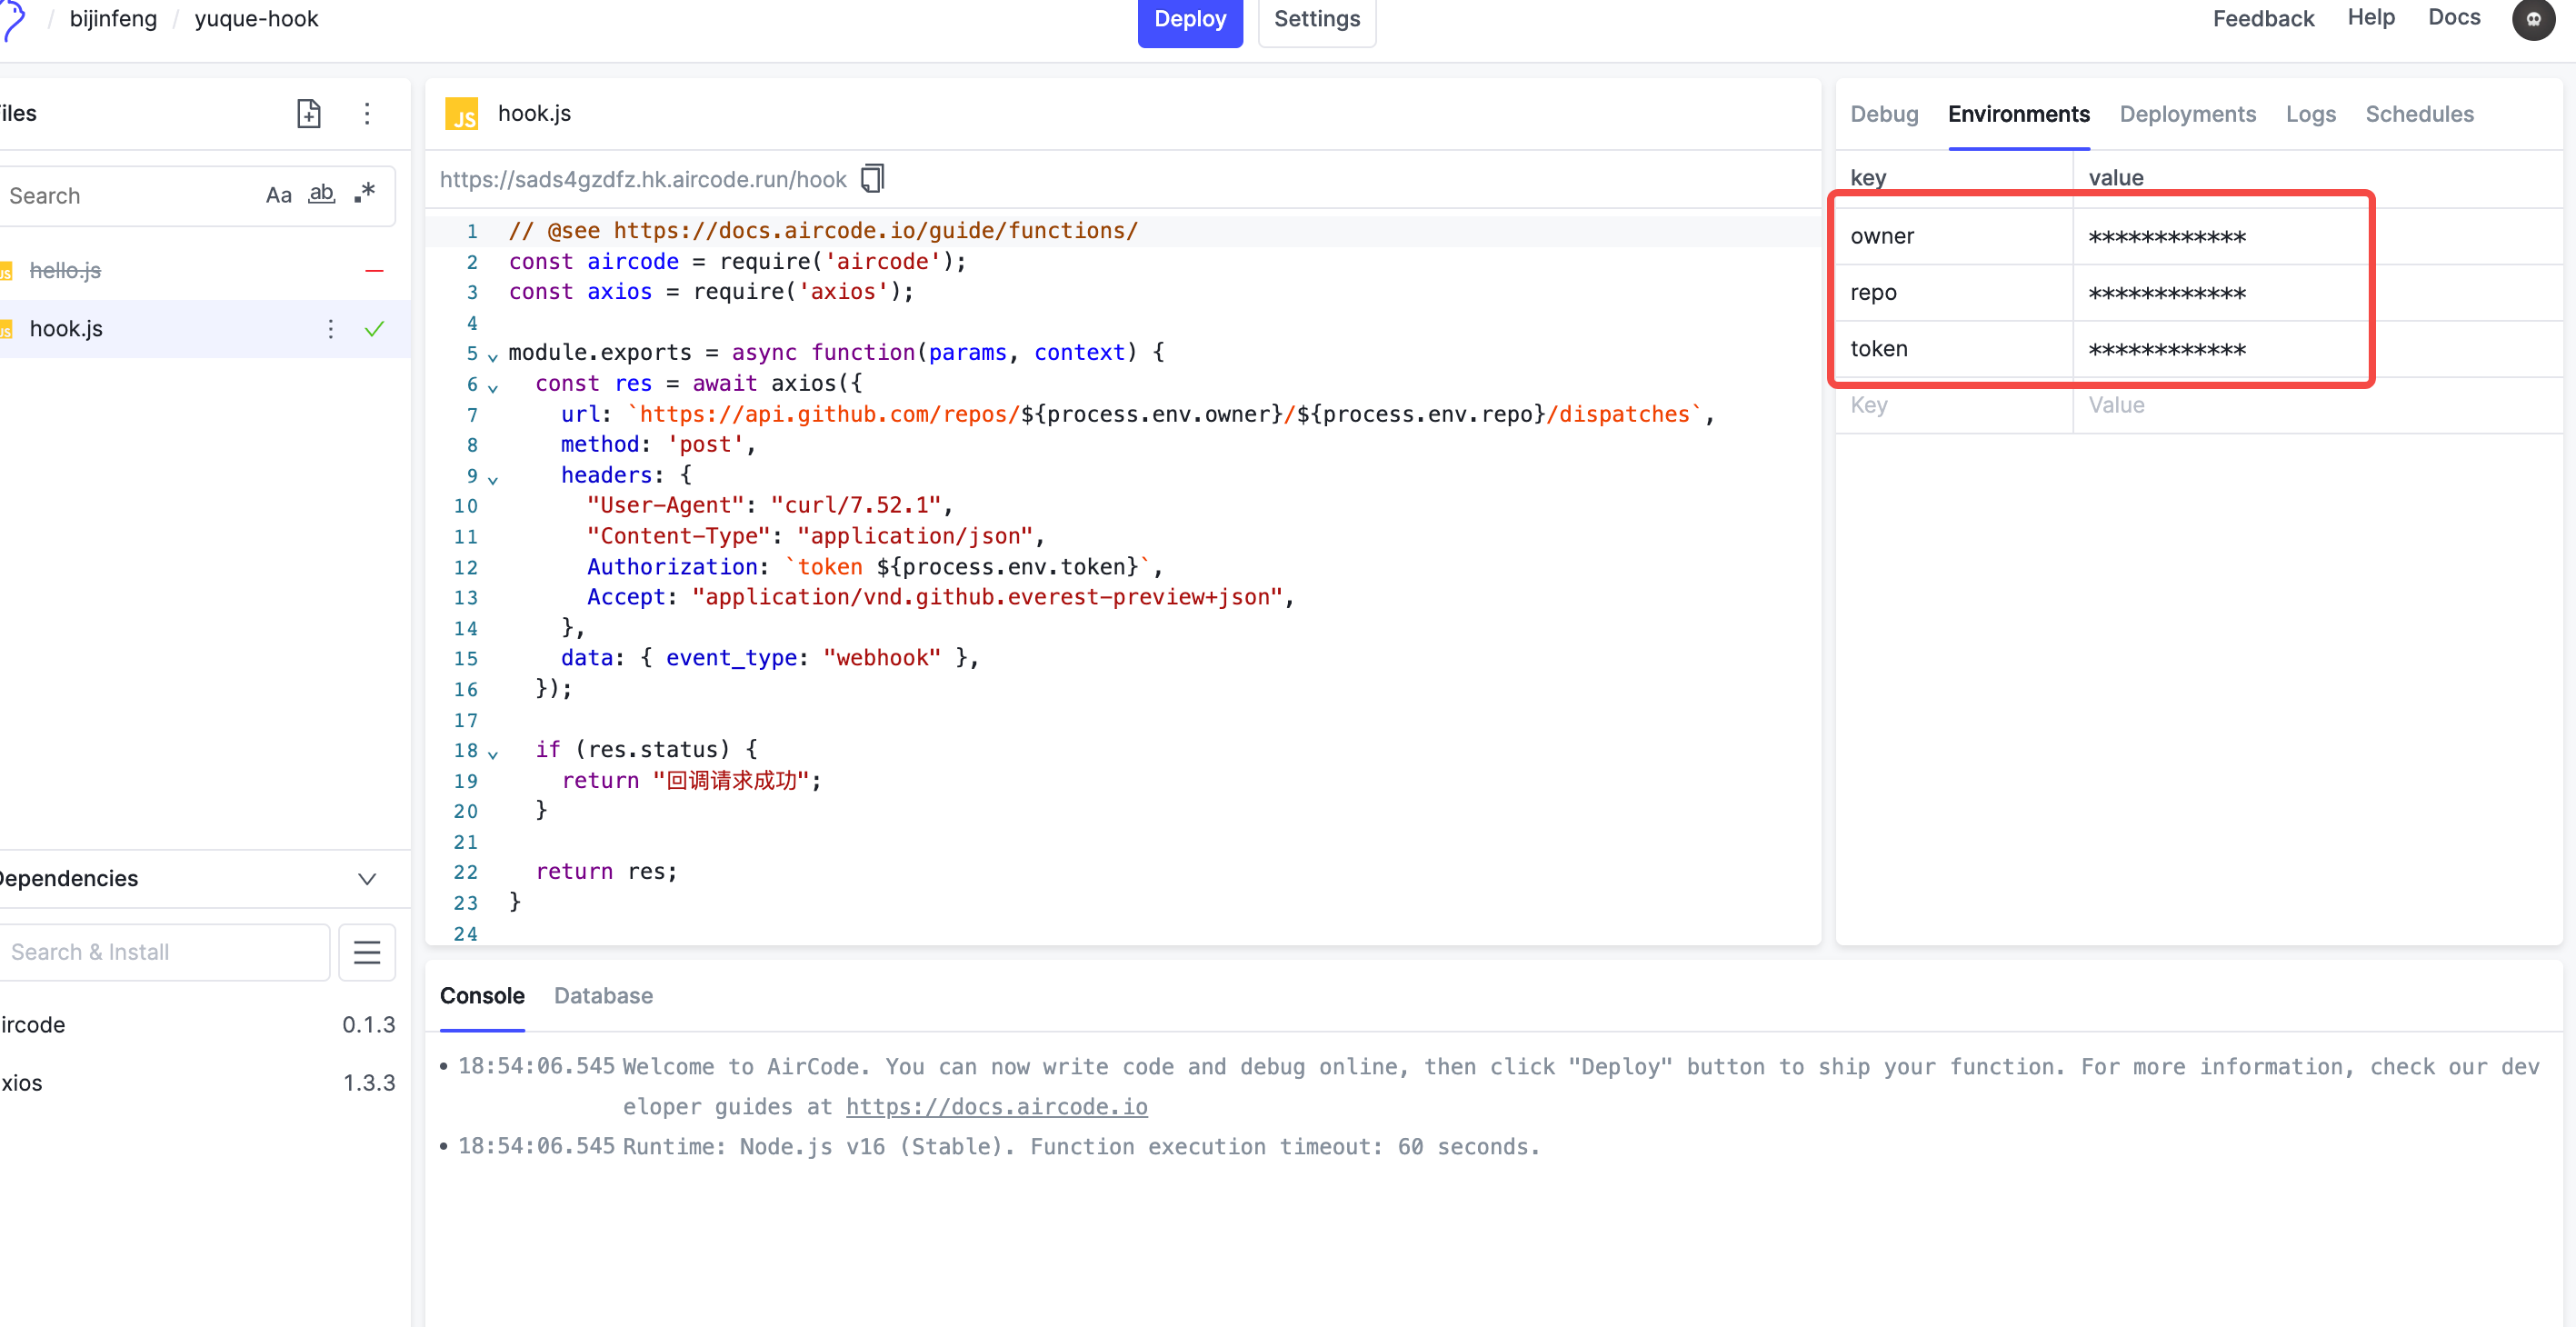
使用也很简单,新建个项目后,添加三个环境变量
填入以下代码:
1
2
3
4
5
6
7
8
9
10
11
12
13
14
15
16
17
18
19
20
21
22
23
|
const aircode = require("aircode");
const axios = require("axios");
module.exports = async function (params, context) {
const res = await axios({
url: `https://api.github.com/repos/${process.env.owner}/${process.env.repo}/dispatches`,
method: "post",
headers: {
"User-Agent": "curl/7.52.1",
"Content-Type": "application/json",
Authorization: `token ${process.env.token}`,
Accept: "application/vnd.github.everest-preview+json",
},
data: { event_type: "webhook" },
});
if (res.status) {
return "回调请求成功";
}
return res;
};
|
点击 deploy按钮发布后,会得到云函数的公网访问路径,填到语雀的知识库配置中即可。
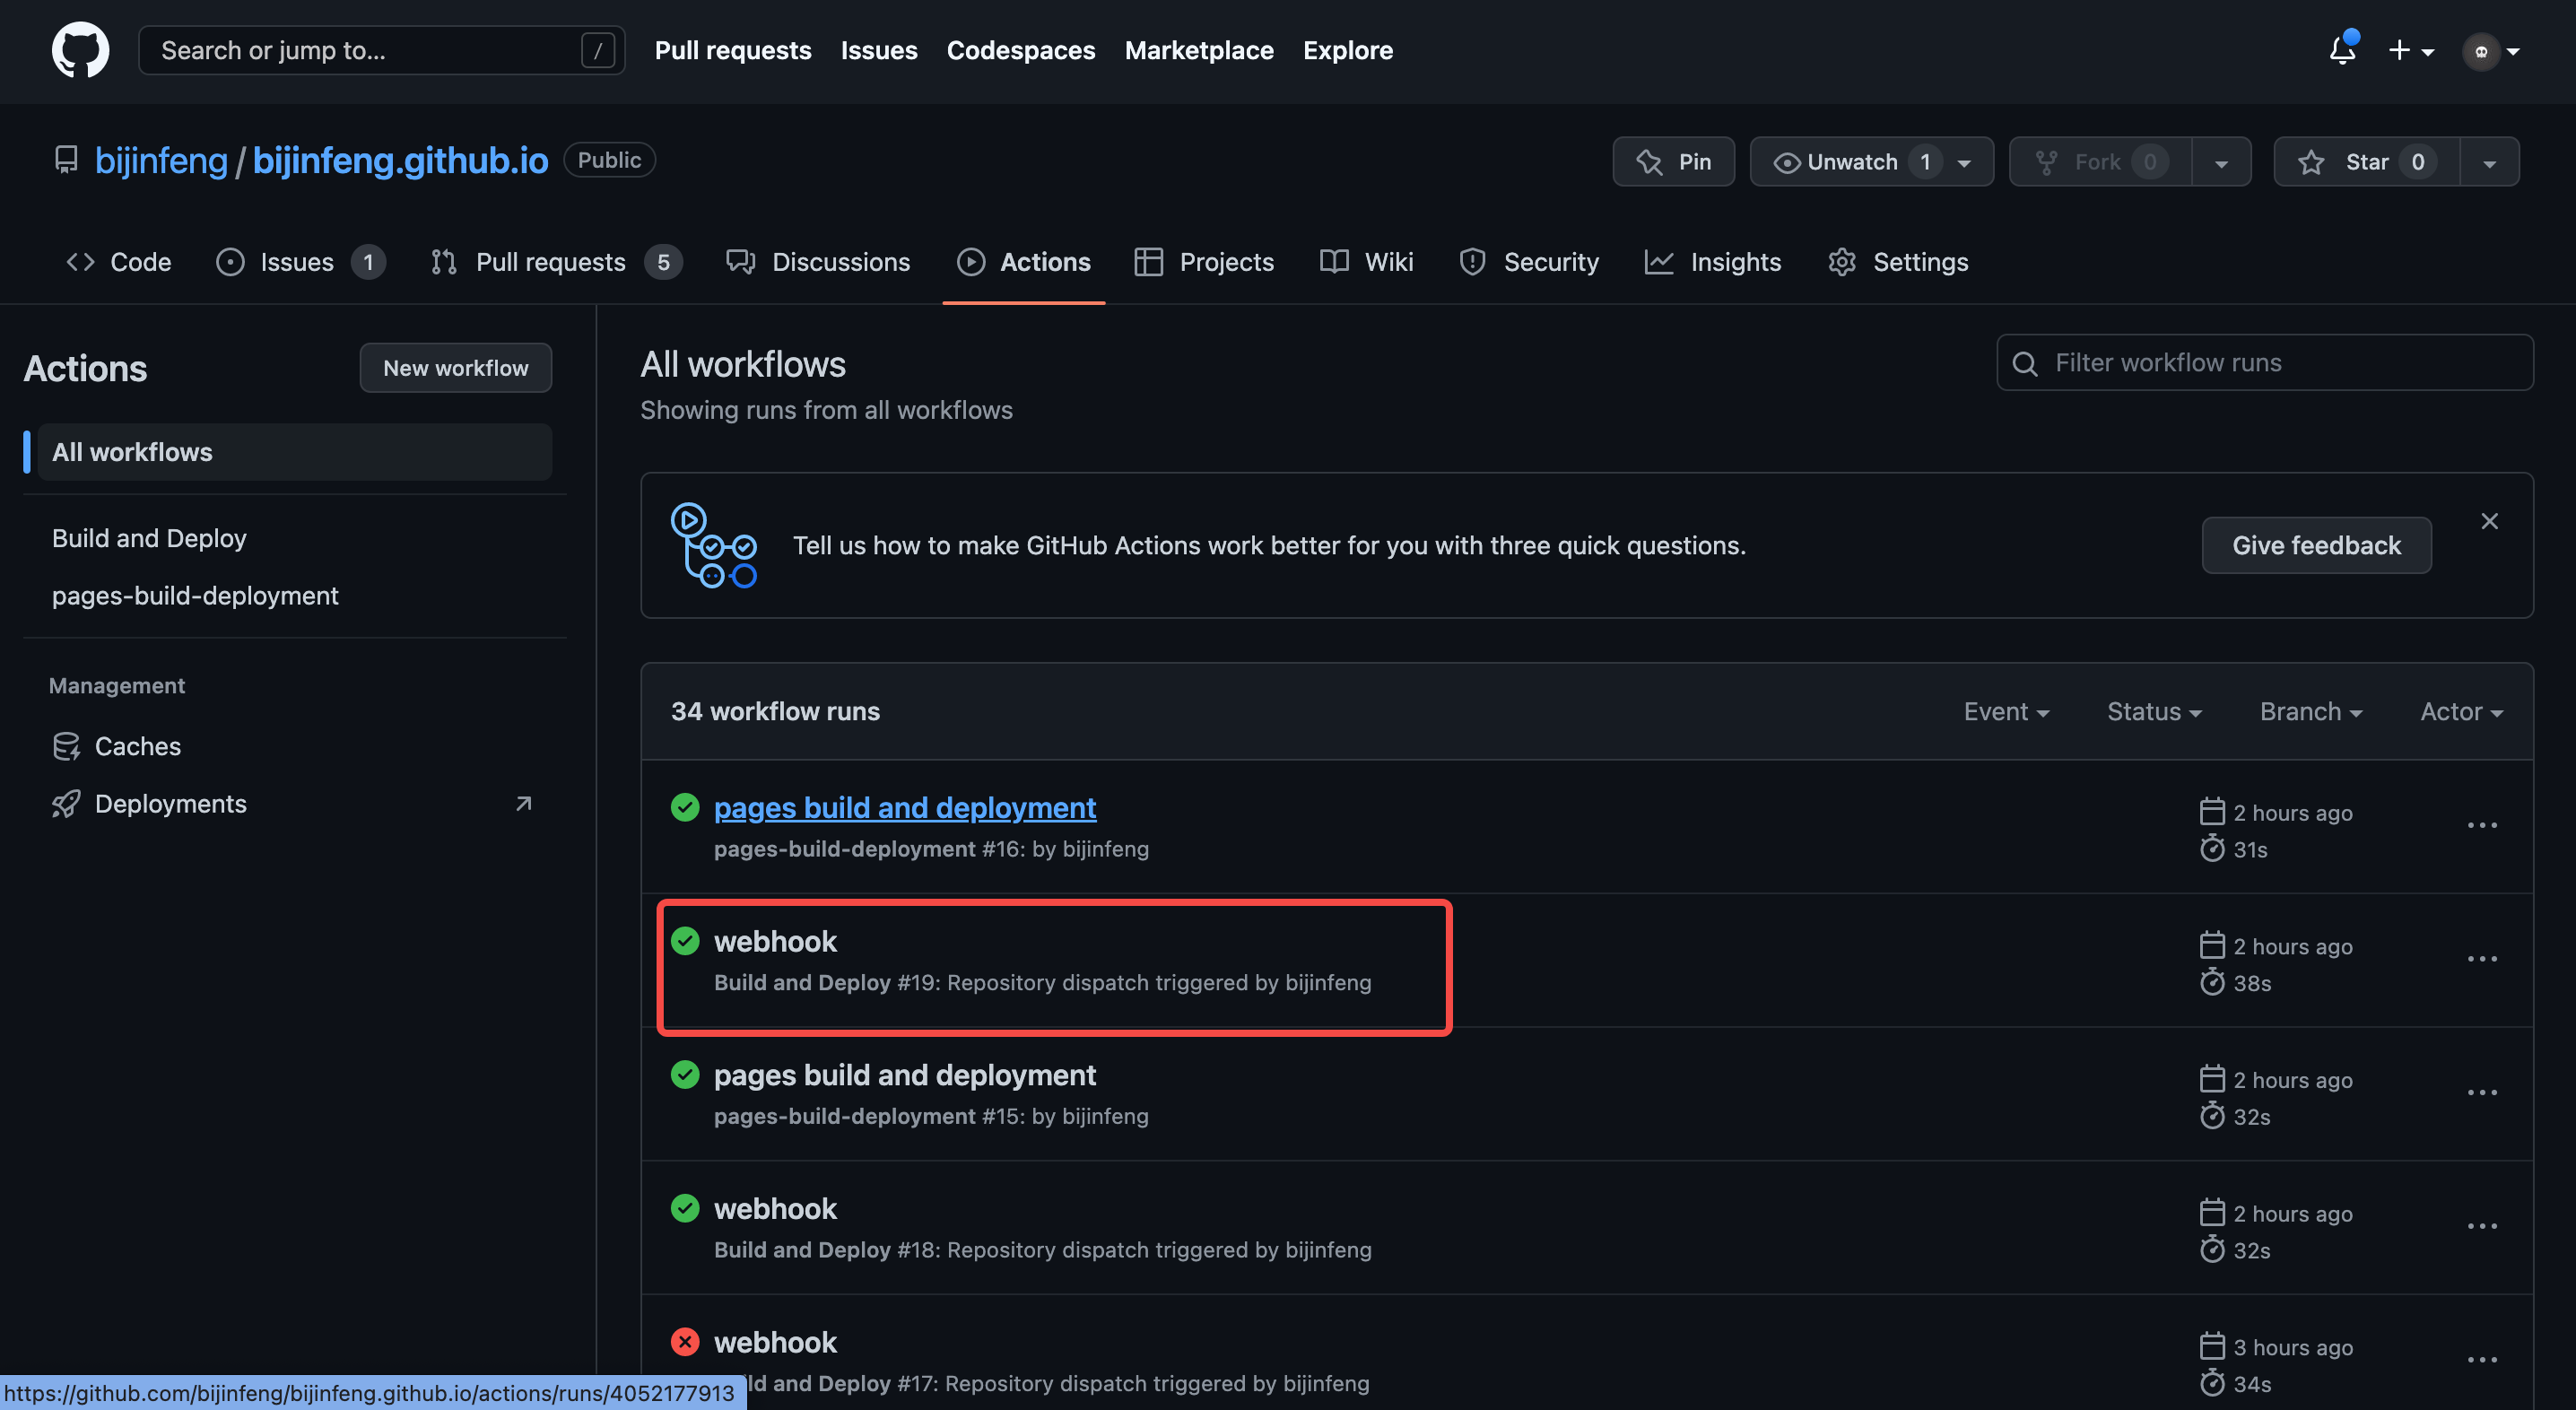
发布文章
现在,在发布和更新文章后,即可触发 Action。
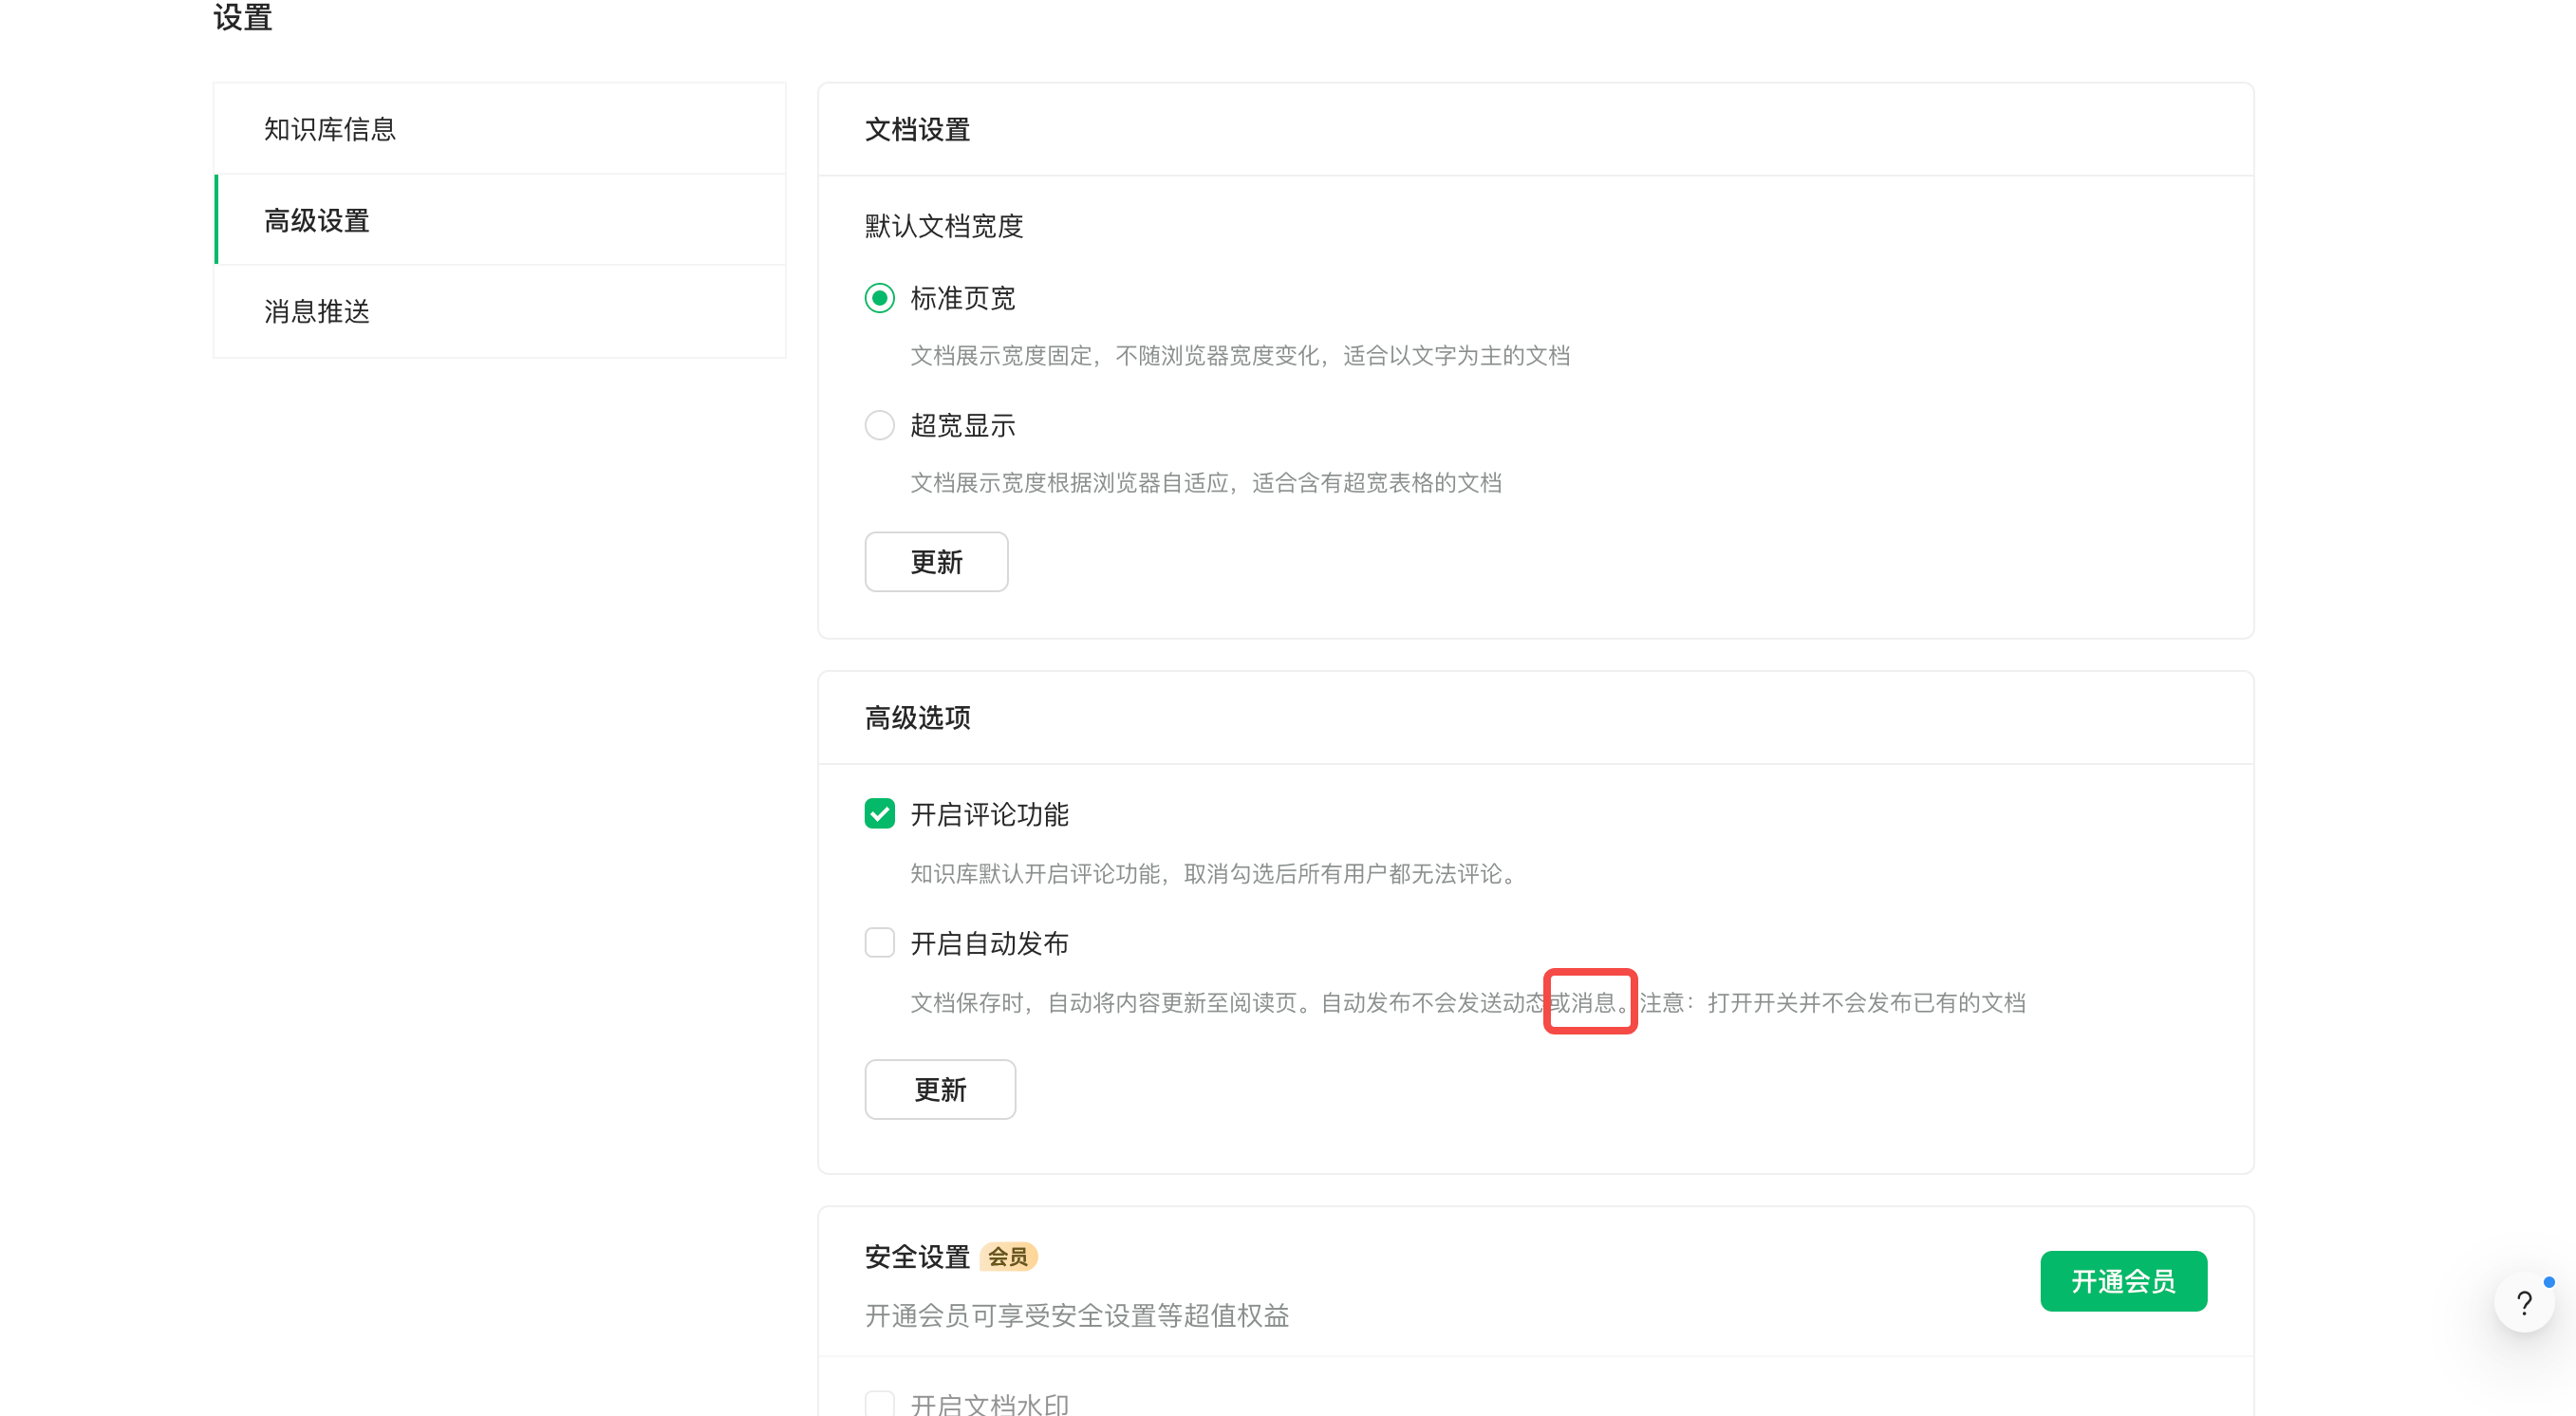
注意事项
- 不要开启自动发布,否则无法触发 webhook