React 中的 Portal 组件想必对 React 熟悉的同学都不会陌生,它提供了一种将子节点脱离父节点渲染到其它 DOM 节点的方案。
createPortal 文档:https://react.dev/reference/react-dom/createPortal#usage
默认下情况下 JSX 中的元素顺序就是其渲染到真实 DOM 的顺序:
1
2
3
4
5
6
7
8
function MyComponent ( return ( <div style ={{ border: "2px solid black " }}> <p > This child is placed in the parent div.</p > <p > This child is placed in the document body.</p > </div > ); }
渲染后的 DOM 结构如下:
1
2
3
4
5
6
7
8
9
10
<body> <div id ="root" > ... <div style ="border: 2px solid black" > <p > This child is placed inside the parent div.</p > <p > This child is placed in the document body.</p > </div > ... </div > </body>
使用 createPortal 后
1
2
3
4
5
6
7
8
9
10
11
12
13
import { createPortal } from "react-dom" ;function MyComponent ( return ( <div style ={{ border: "2px solid black " }}> <p > This child is placed in the parent div.</p > {createPortal( <p > This child is placed in the document body.</p > , document.body )} </div > ); }
p 表单虽然还在 div 标签里,但是最终渲染到 DOM 后却在 document.body 里:
1
2
3
4
5
6
7
8
9
10
<body> <div id ="root" > ... <div style ="border: 2px solid black" > <p > This child is placed inside the parent div.</p > </div > ... </div > <p > This child is placed in the document body.</p > </body>
createPortal 因为其脱离父元素的特性,最常见的场景就是 Modal,Drawer 等组件,以 Ant Design 举例:
1
2
3
4
5
6
7
8
9
10
11
12
13
14
15
16
17
18
19
20
21
22
23
24
25
26
27
28
29
30
31
32
33
34
35
36
37
38
import React , { useState } from "react" ;import { Button , Modal } from "antd" ;const App : React .FC = () => { const [isModalOpen, setIsModalOpen] = useState (false ); const showModal = ( setIsModalOpen (true ); }; const handleOk = ( setIsModalOpen (false ); }; const handleCancel = ( setIsModalOpen (false ); }; return ( <> <Button type ="primary" onClick ={showModal} > Open Modal </Button > <Modal title ="Basic Modal" open ={isModalOpen} onOk ={handleOk} onCancel ={handleCancel} > <p > Some contents...</p > <p > Some contents...</p > <p > Some contents...</p > </Modal > </> ); }; export default App ;
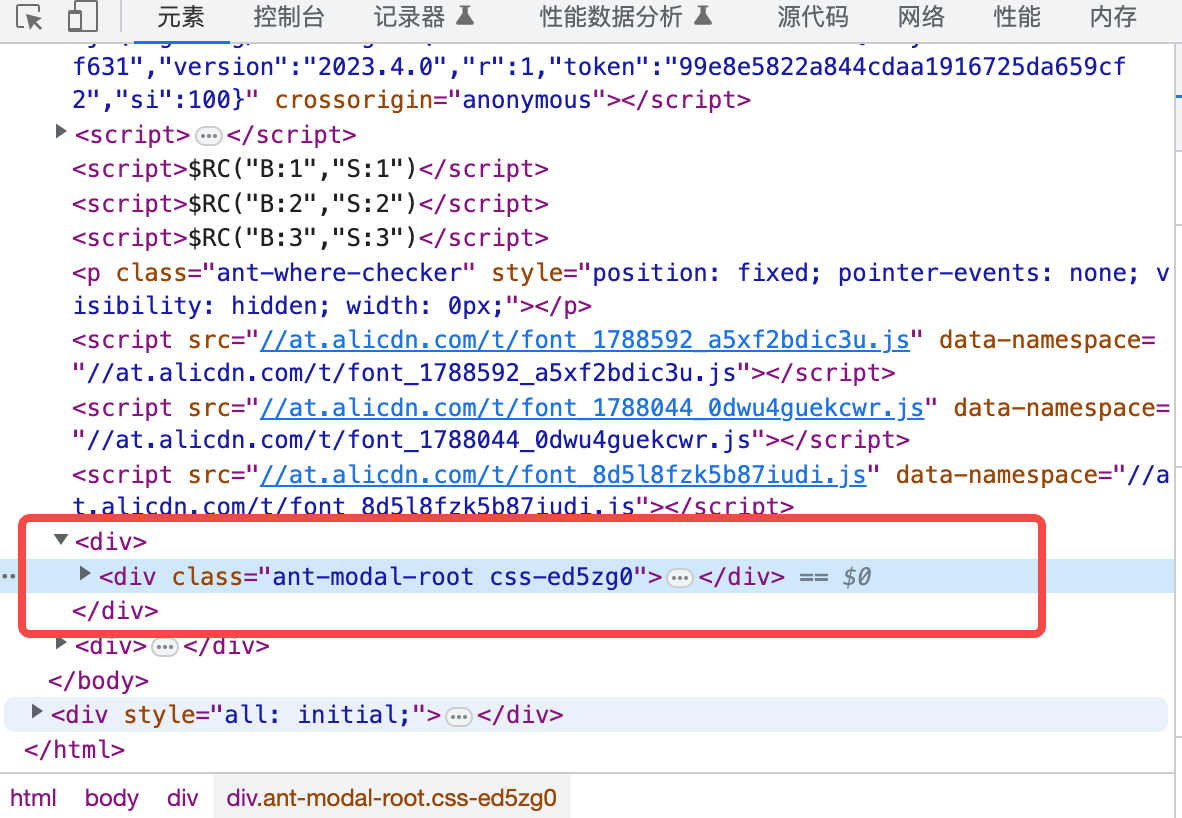
在 JSX 中 Button 和 Modal 虽然是在同一级,但是在渲染到真实 dom 后,Modal 却是渲染成 body 的直接子元素:
为什么需要 Portal 组件 这是因为我们经常会遇到需要管理组件层级的情况,最常见的就是页面出现多个 Modal,如何管理这些 Modal 就是个很复杂的问题,第一个我们一般会想到用 z-index 调整组件的层级,首先不提手动管理 z-index 合不合理,就是 z-index 本身也不能适用所有场景,它也是有局限性的:
必须是一个定位的(即其 position 属性值不是 static )脱离了文档流的元素,z-index 才能生效
z-index 不一定是值越大越靠前。实际上在 CSS 中元素的层级是由层叠上下文决定的,z-index 只在同一个层叠上下文中比较才有意义,就像省长的秘书和市长的秘书,虽然都是秘书,但是这有可比性吗。看以下代码:
1 2 3 4 5 6 <div style ="position:relative; z-index:auto;" > <img src ="mm1.jpg" style ="position:absolute; z-index:2;" /> <-- 横妹子 --> </div > <div style ="position:relative; z-index:auto;" > <img src ="mm2.jpg" style ="position:relative; z-index:1;" /> <-- 竖妹子 --> </div >
横妹子 会盖在 竖妹子身上,这是因此两个 img 的父级在同一层叠上下文中,这是 z-index 的大小比较就有了意义。
简单修改下,将 z-index:auto改成 z-index:0,这时两张图片的层级就发生了颠倒:
1 2 3 4 5 6 <div style ="position:relative; z-index:0;" > <img src ="mm1.jpg" style ="position:absolute; z-index:2;" /> <-- 横妹子 --> </div > <div style ="position:relative; z-index:0;" > <img src ="mm2.jpg" style ="position:relative; z-index:1;" /> <-- 竖妹子 --> </div >
这是因为 z-index:0创建了一个层级上下文,这时两个 img 会先比较父元素的层级,而由于两者的层叠顺序一样,会按照 DOM 流的顺序比较层级大小,自然是后面的 竖妹子 覆盖在 横妹子 上,其实这时候子元素的 z-index就是打酱油的,改成任何值都不会影响他们的层级顺序。
不明白什么是 「层叠上下文」的,可以看张鑫旭的这篇文章:https://www.zhangxinxu.com/wordpress/2016/01/understand-css-stacking-context-order-z-index/
话说回来,用 z-index 来调整层级有这么多限制,肯定是不行的,我们需要的是一个简单高效的方式,这就不得不提 Portal 组件的高明之处了:
由于 Portal 会将子节点脱离父节点所在的上下文,布局就可以不受父节点的影响
Portal 可以将子节点统一插入到 body 中,这是会在同一个层叠上下文中,层级的顺序取决于在在 BOM 流的顺序,也可以说是取决于 Portal 执行的顺序
使用 Portal 组件 虽然 Portal 特别贴合某些使用场景,但是 React Native 却没有提供原生的 Portal 组件,我们在 React 中常用的 Portal 组件,是 react-dom 提供的,它只适用于浏览器这样的宿主环境:
1 import { Portal } from "react-dom" ;
得益于前端活跃到夸张的社区,这类实用的组件自然早早就有了开源方案 - react-native-portal
下面我们看下如何使用这个组件:
安装该组件
1 2 3 4 5 6 7 8 npm install @gorhom/portal yarn add @gorhom/portal pnpm install @gorhom/portal
添加全局 context
1
2
3
4
5
export const App = ( <PortalProvider > {... your app goes here} </PortalProvider > );
然后在需要的地方使用 Portal 组件即可
1
2
3
4
5
6
7
8
9
10
11
const BasicScreen = ( return ( { ... } <Portal > <Text > Text to be teleported to the root host </Text > </Portal > { ... } ); };
那么所有使用 Portal 组件的子元素都会被插入到 PortalProvider 中,如果需要改变被插入的位置,可以使用 PortalHost自定义插入位置:
1
2
3
4
5
6
7
const CustomView = ( return ( { ... } <PortalHost name="CustomPortalHost" /> { ... } ); };
更多使用方法见官方文档,这里提个文章没有提到的使用技巧。Portal组件必须要在 React Component 中使用,那么一般的 function 中如何才能使用 Portal:
1 2 3 4 5 6 7 8 9 10 11 12 13 14 15 16 17 18 19 20 21 22 23 export type PortalService = ReturnType <typeof usePortal>;export const PortalRef = React .createRef <PortalService >() as MutableRefObject <PortalService >;const InitializePortalRef = ( const portal = usePortal (); PortalRef .current = portal; return null ; }; <PortalProvider > <InitializePortalRef /> {children} </PortalProvider > PortalRef .current ?.removePortal (key);PortalRef .current ?.updatePortal (key, renderToast ());PortalRef .current ?.addPortal (key, renderToast ());
实现 Portal 组件 上面介绍了如何使用开源社区的 Portal 组件,下面我们就来分析下它是如何实现的,react-native-portal 组件的 API 并不多,只有三个组件 Portal,PortalHost,PortalProvider 和一个自定义 hook usePortal。
先看下 PortalProvider 这个组件内部都做了什么:
1
2
3
4
5
6
7
8
9
10
11
12
13
14
15
const PortalProviderComponent = ({ rootHostName = "root" , shouldAddRootHost = true , children, }: PortalProviderProps ) => { const [state, dispatch] = useReducer (reducer, INITIAL_STATE ); return ( <PortalDispatchContext.Provider value ={dispatch} > <PortalStateContext.Provider value ={state} > {children} {shouldAddRootHost && <PortalHost name ={rootHostName} /> } </PortalStateContext.Provider > </PortalDispatchContext.Provider > ); };
这个组件中通过 useReducer 初始化了两个 context:
PortalDispatchContext 里面定义了一系列方法,包含 AddUpdatePortalAction,RemovePortalAction, RegisterHostAction,UnregisterHostAction,从名字就能看出来这些方法是做什么的
PortalStateContext 里面存储了上面的一系列方法收集的节点
通过 useReducer 定义的 dispatch 使用起来还是有些繁琐了,所以通过 usePortal 再封装下
1
2
3
4
5
6
7
8
9
10
11
12
13
14
15
16
17
18
19
20
21
22
23
24
25
26
27
28
29
30
31
32
33
34
35
36
37
38
39
40
41
42
43
44
45
46
47
48
49
50
51
52
53
54
55
56
57
58
import { ReactNode , useCallback, useContext } from "react" ;import { ACTIONS } from "../state/constants" ;import { PortalDispatchContext } from "../contexts/portal" ;export const usePortal = (hostName: string = "root" ) => { const dispatch = useContext (PortalDispatchContext ); if (dispatch === null ) { throw new Error ( "'PortalDispatchContext' cannot be null, please add 'PortalProvider' to the root component." ); } const registerHost = useCallback (() => { dispatch ({ type : ACTIONS .REGISTER_HOST , hostName : hostName, }); }, []); const deregisterHost = useCallback (() => { dispatch ({ type : ACTIONS .DEREGISTER_HOST , hostName : hostName, }); }, []); const addUpdatePortal = useCallback ((name: string , node: ReactNode ) => { dispatch ({ type : ACTIONS .ADD_UPDATE_PORTAL , hostName, portalName : name, node, }); }, []); const removePortal = useCallback ((name: string ) => { dispatch ({ type : ACTIONS .REMOVE_PORTAL , hostName, portalName : name, }); }, []); return { registerHost, deregisterHost, addPortal : addUpdatePortal, updatePortal : addUpdatePortal, removePortal, }; };
准备工作都准备好了,看下如何收集 Portal 中的子节点(简化了下源码,只保留关键的地方)
1
2
3
4
5
6
7
8
9
10
11
12
13
14
15
16
17
18
19
20
21
22
23
24
25
26
27
28
29
30
31
32
33
34
35
36
37
38
39
40
41
const PortalComponent = ({ children, name: _providedName } ) => { const { addPortal : addUpdatePortal, removePortal } = usePortal (hostName); const handleOnMountRef = useRef<Function >(); const handleOnUnmountRef = useRef<Function >(); const handleOnUpdateRef = useRef<Function >(); handleOnMountRef.current = () => { addUpdatePortal (name, children); }; handleOnUnmountRef.current = () => { removePortal (name); }; handleOnUpdateRef.current = () => { addUpdatePortal (name, children); }; useEffect (() => { handleOnMountRef.current ?.(); return () => { handleOnUnmountRef.current ?.(); handleOnMountRef.current = undefined ; handleOnUnmountRef.current = undefined ; handleOnUpdateRef.current = undefined ; }; }, []); useEffect (() => { handleOnUpdateRef.current ?.(); }, [children]); return null ; };
现在已经收集到 Portal 中的子元素,下面就是将它们渲染出来了
1
2
3
4
5
6
7
8
9
10
11
12
13
14
15
16
17
18
19
20
21
22
23
24
25
26
27
28
import React , { memo, useEffect } from "react" ;import { usePortalState } from "../../hooks/usePortalState" ;import { usePortal } from "../../hooks/usePortal" ;import type { PortalHostProps } from "./types" ;const PortalHostComponent = ({ name }: PortalHostProps ) => { const state = usePortalState (name); const { registerHost, deregisterHost } = usePortal (name); useEffect (() => { registerHost (); return () => { deregisterHost (); }; }, []); return <> {state.map((item) => item.node)}</> }; export const PortalHost = memo (PortalHostComponent );PortalHost .displayName = "PortalHost" ;
渲染就很简单了,从 context 中取出节点,通过 map 渲染就出就完事了,唯一需要注意的是,Host 是有分组的,每个 Host 组件只负责渲染它这个分组内的节点即可
总结 Portal 组件虽然很基础,但是却广泛应用在 Modal 等组件中,可以让我们免于手动管理组件层级问题,同时其脱离文档流的能力有时也会有些出乎意料的应用。
上面提到的都是 React 中的 Portal 组件,那么 Vue 中有没有类似的组件呢?
在 Vue 3 之前是没有的,需要使用社区提供的开源方案 - portal-vue 。Vue 3 后有了原生的组件 - Teleport 。
殊途同归,可见 Portal 不局限于一个框架,是个通用的解决方案。